Setting up a Make Scenario with Admin Shortcuts
Build a Make (Integromat) scenario triggered by an Admin Shortcuts webhook to automate Shopify admin tasks.
Make is a powerful automation tool built around a visual workflow "scenario" builder. Make was relaunched in early 2022, building on Integromat, another popular automation tool that had been around for nearly 10 years.
With its visual approach to workflows, Make is a powerful tool for Shopify merchants to design, build, and automate all kinds of store management tasks and processes without the need for coding skills. Make scenarios can be triggered by any of Shopify's 80+ webhooks, as well as completing a plethora of actions within Shopify or in other platforms you use to manage your business.
Need to add every new Shopify customer to a welcome campaign in Mailchimp? Totally doable in Make. Add every new Shopify order to an Airtable for scheduling fulfillment tasks? Also a snap. Want to do both for every new order? A multi-step Make scenario will work great.
Sign up for Make with our affiliate link and receive 1 free month of access to the Pro Plan.
But sometimes you want to do work in other apps while you're reviewing and managing customers or orders in Shopify. Notice an unusually promising customer and want to give them some extra love in your VIP program? With Admin Shortcuts, you can automate the Slack part in Make, triggering it with a custom button you add to your customer pages in Shopify.
Integrating your Shopify store with Make via Admin Shortcuts allows you to automate actions across thousands of apps, enhancing efficiency and reducing manual workload.
This guide will show you how to set up an Admin Button with the built in "Webhooks" app in Make.
What you'll need to get started:
-
Shopify store (any plan)
-
Admin Shortcuts installed from the Shopify App Store (any plan)
-
Make account with access to the built in "Webhooks" app (our affiliate link gives you one free month of the Pro Plan)
Step 1: Start setting up your button in Admin Shortcuts
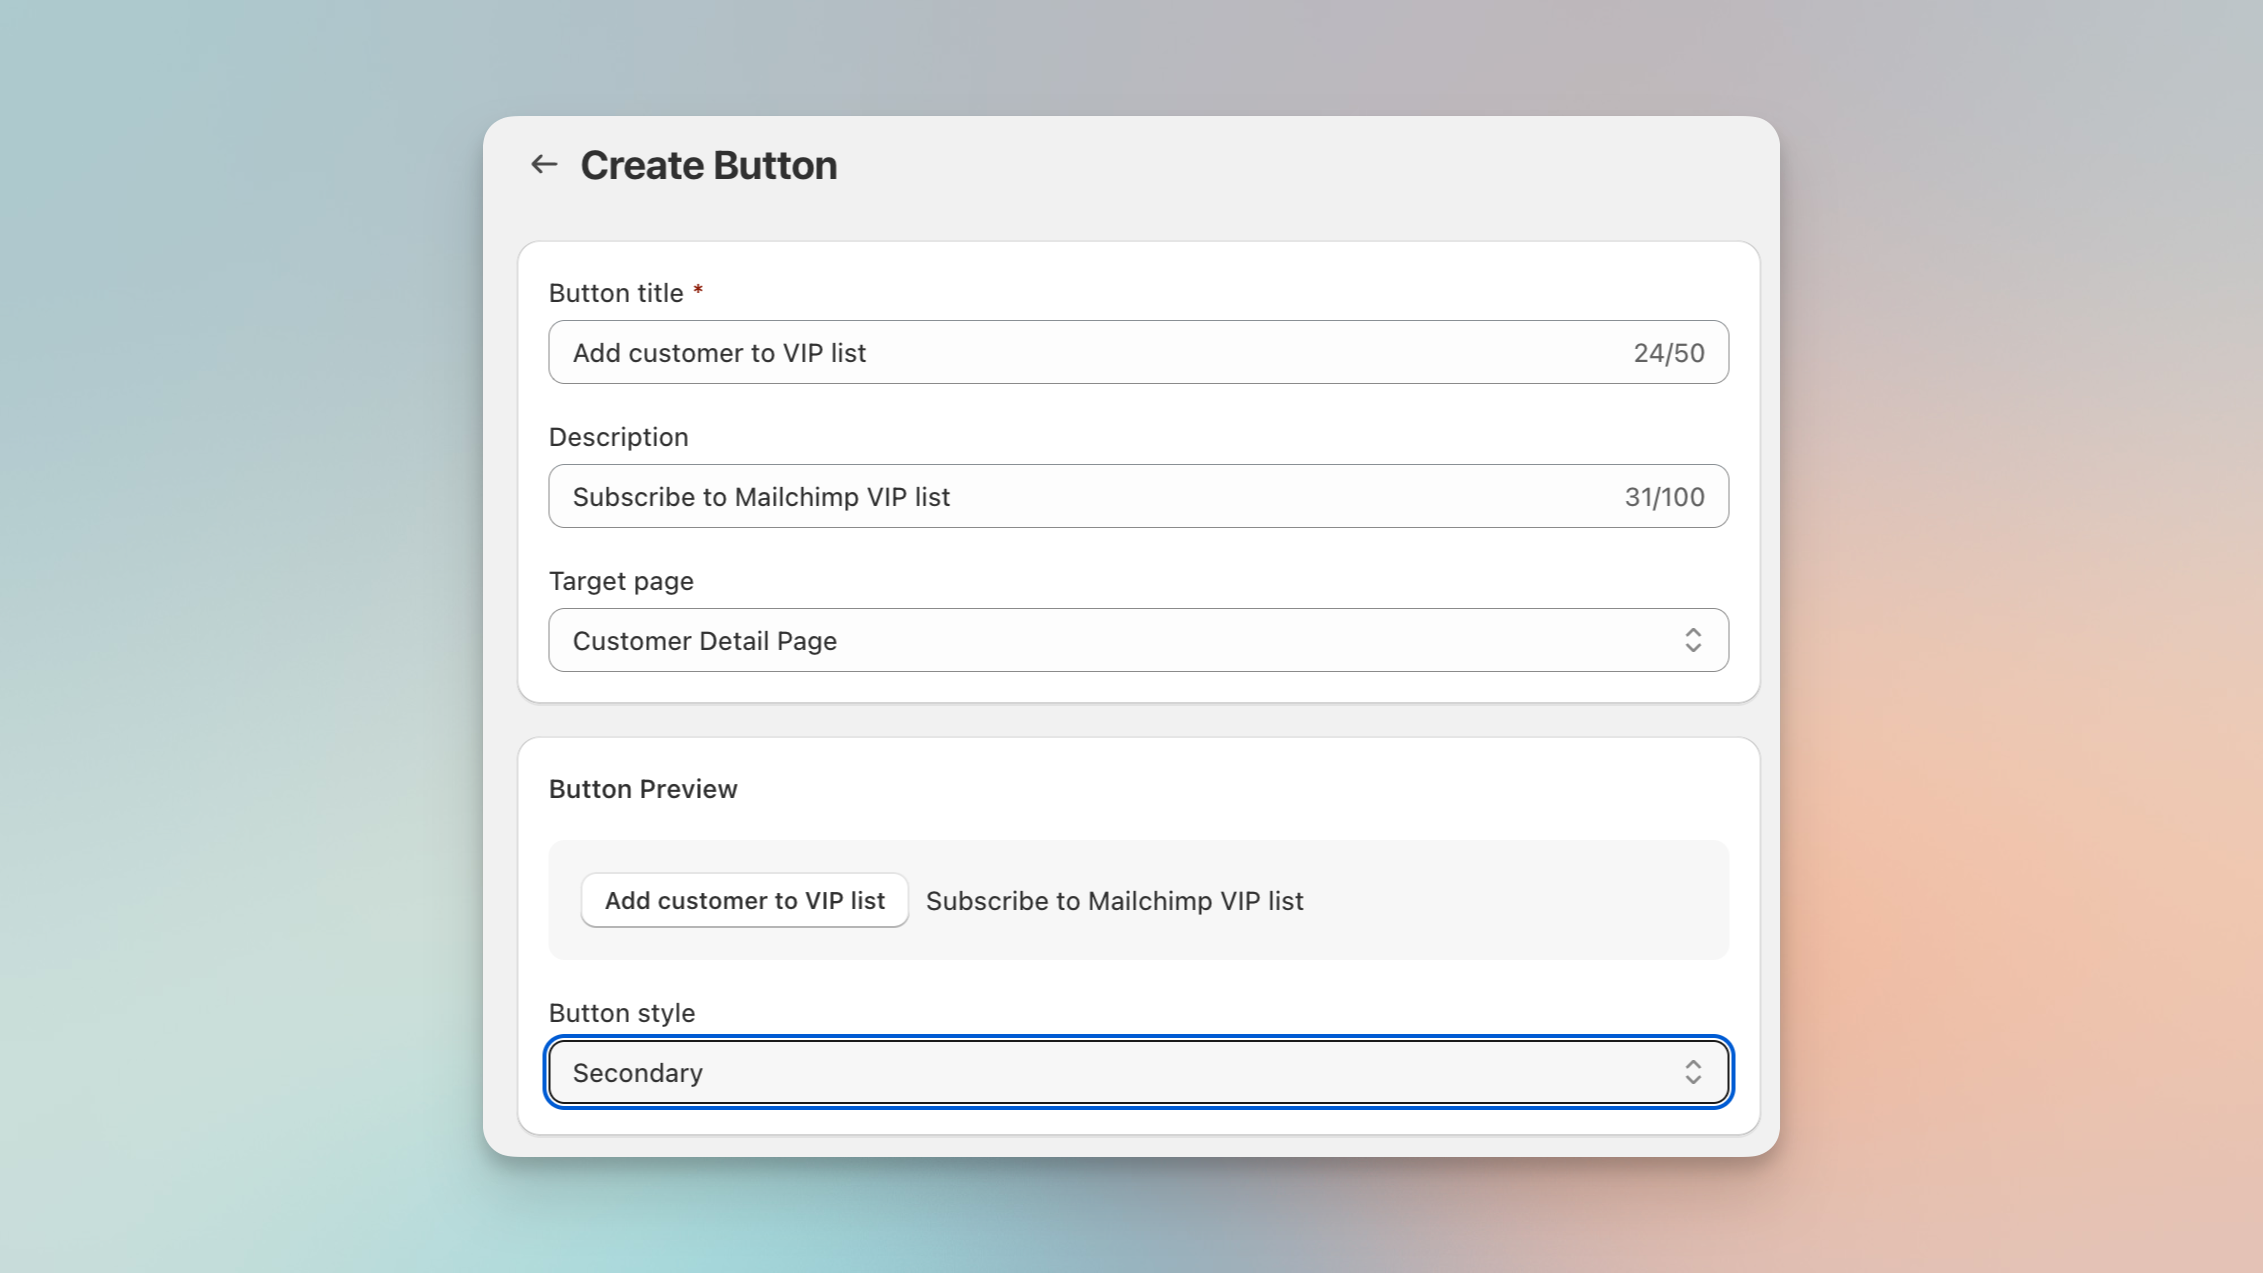
In your Shopify admin, go to Apps > Admin Shortcuts, and click "Create Admin Button". Then:
-
Give your button a title and description and select the type of admin page you want it to appear on. In the case we'll add a button to the Customer detail page.
-
Paste the URL you copied from Make into the Webhook URL field.
-
Click Save.
The next step will be to configure the webhook that is fired when the button is clicked from an order page. To do that, we'll need a webhook URL from Make. (Learn more about using webhooks to automate your Shopify store.)
Step 2: Set up an Make Scenario
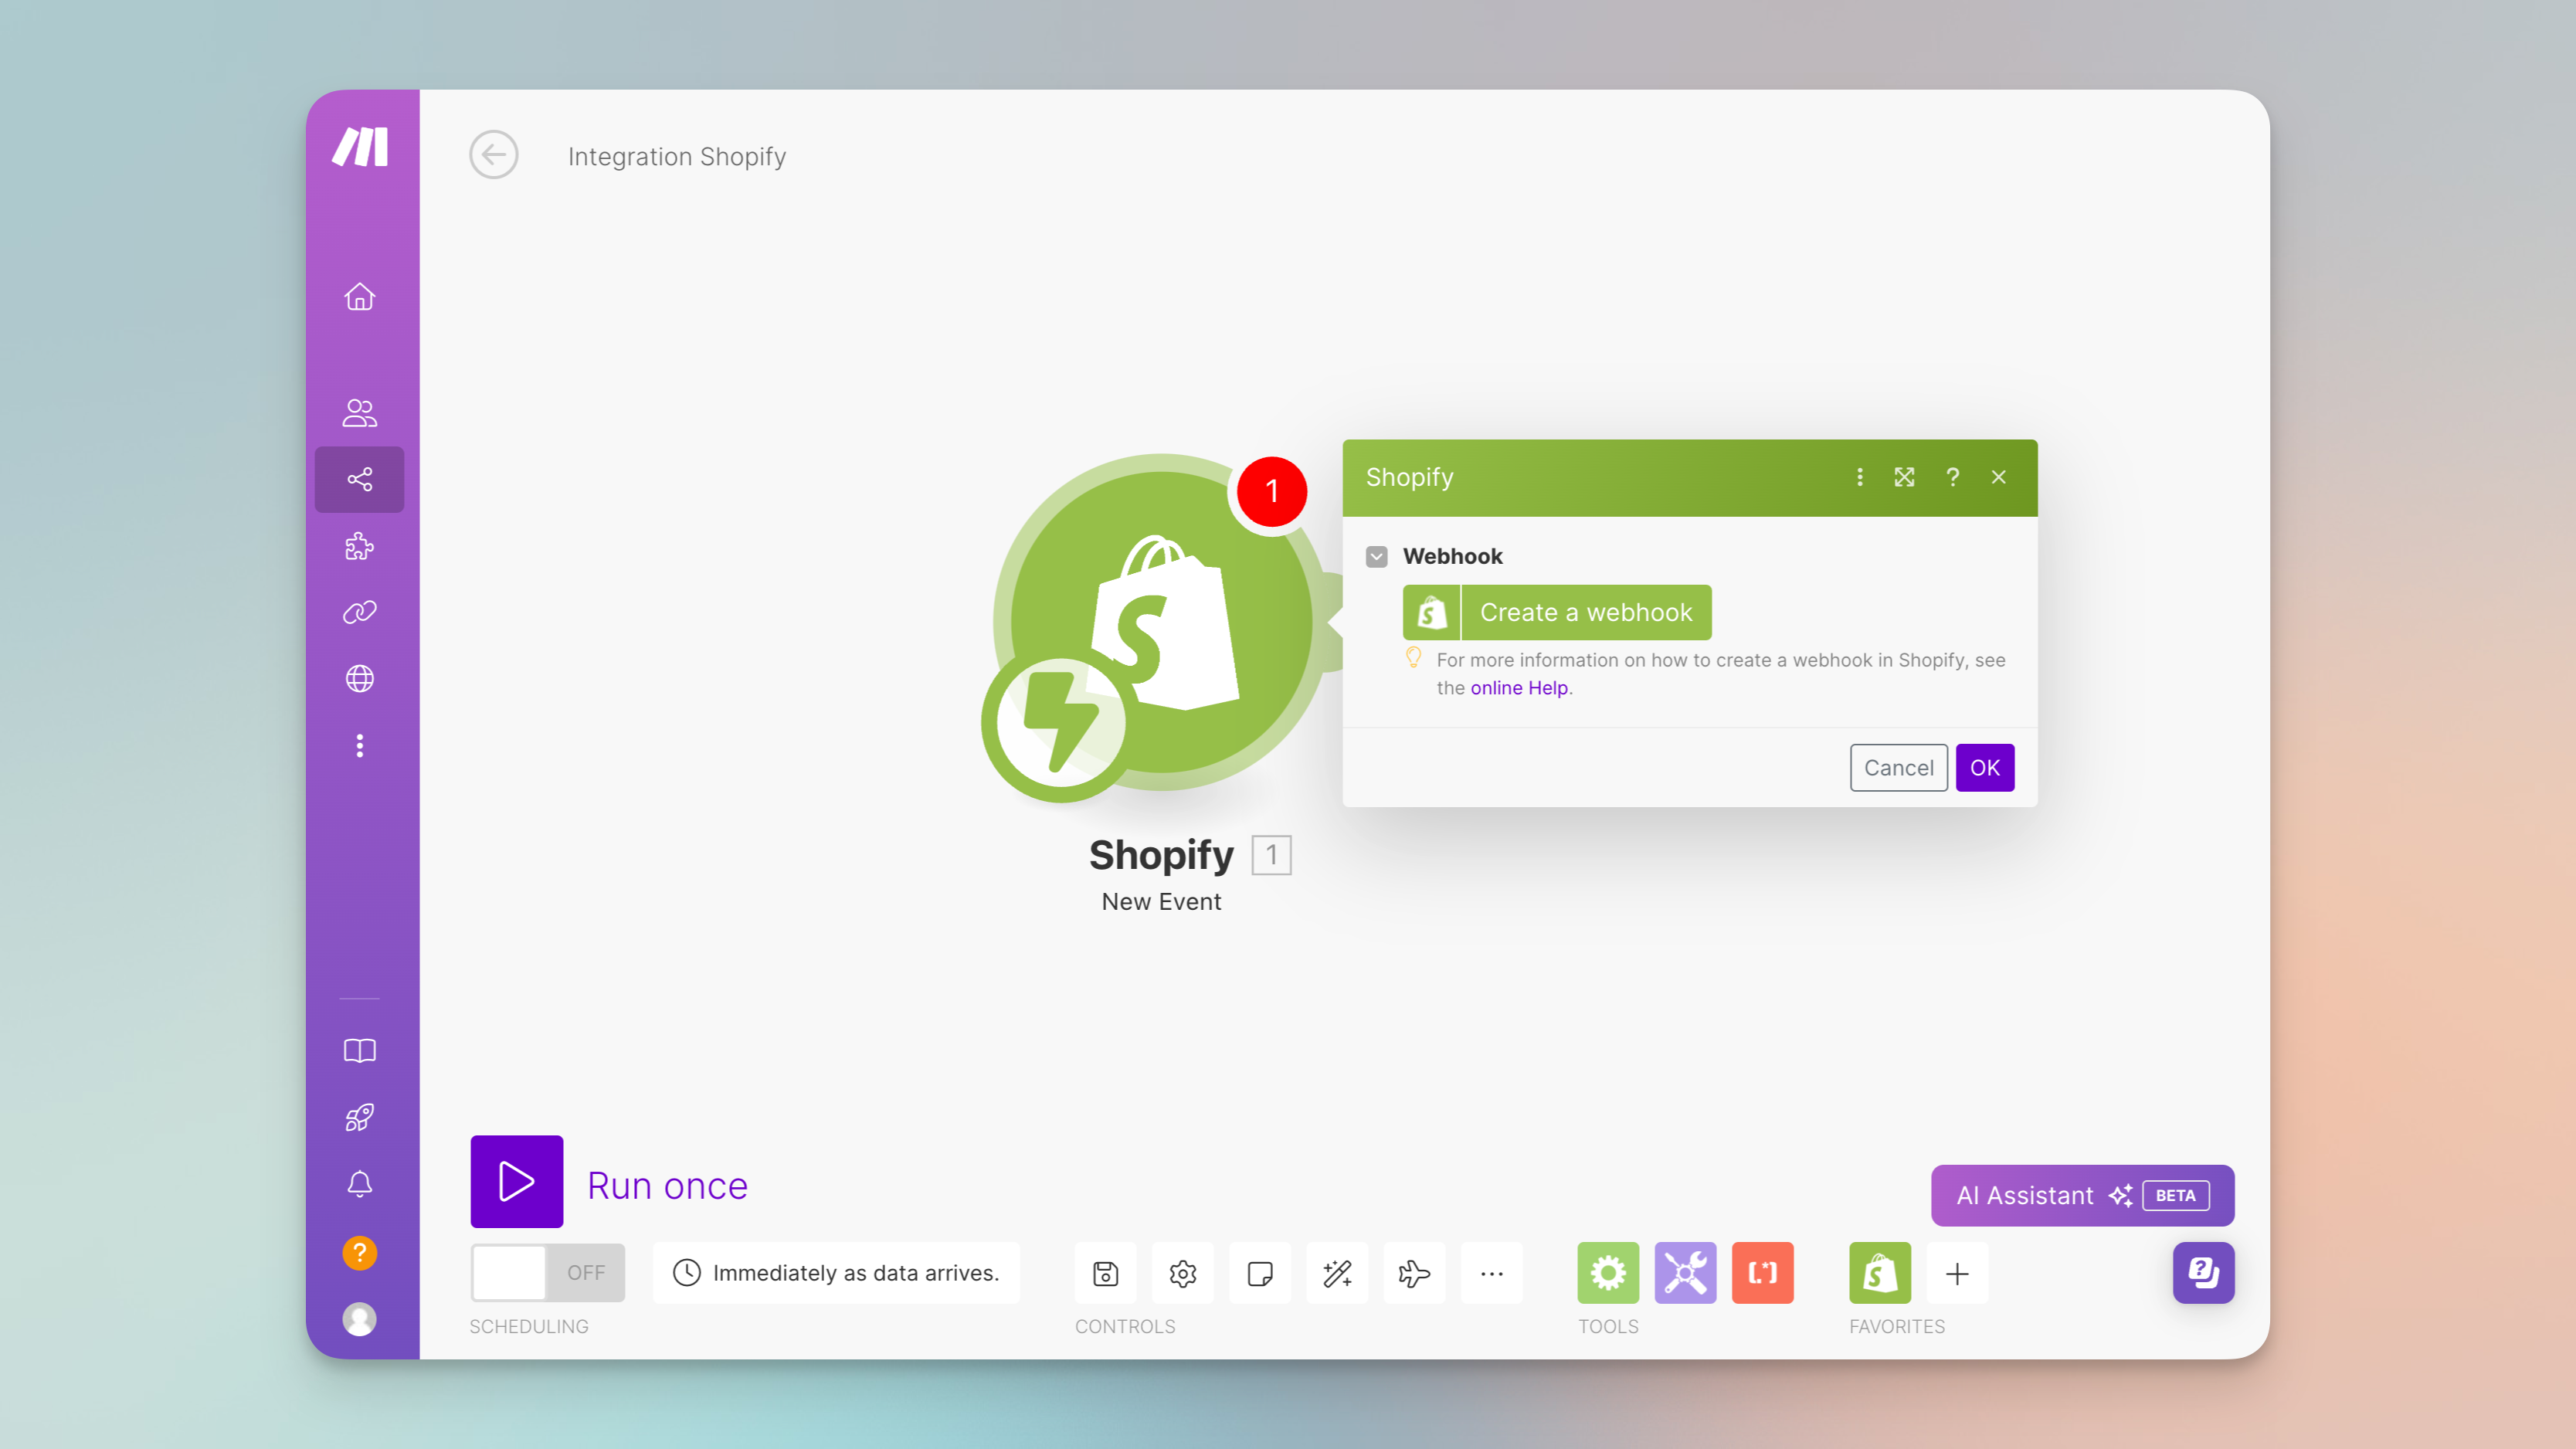
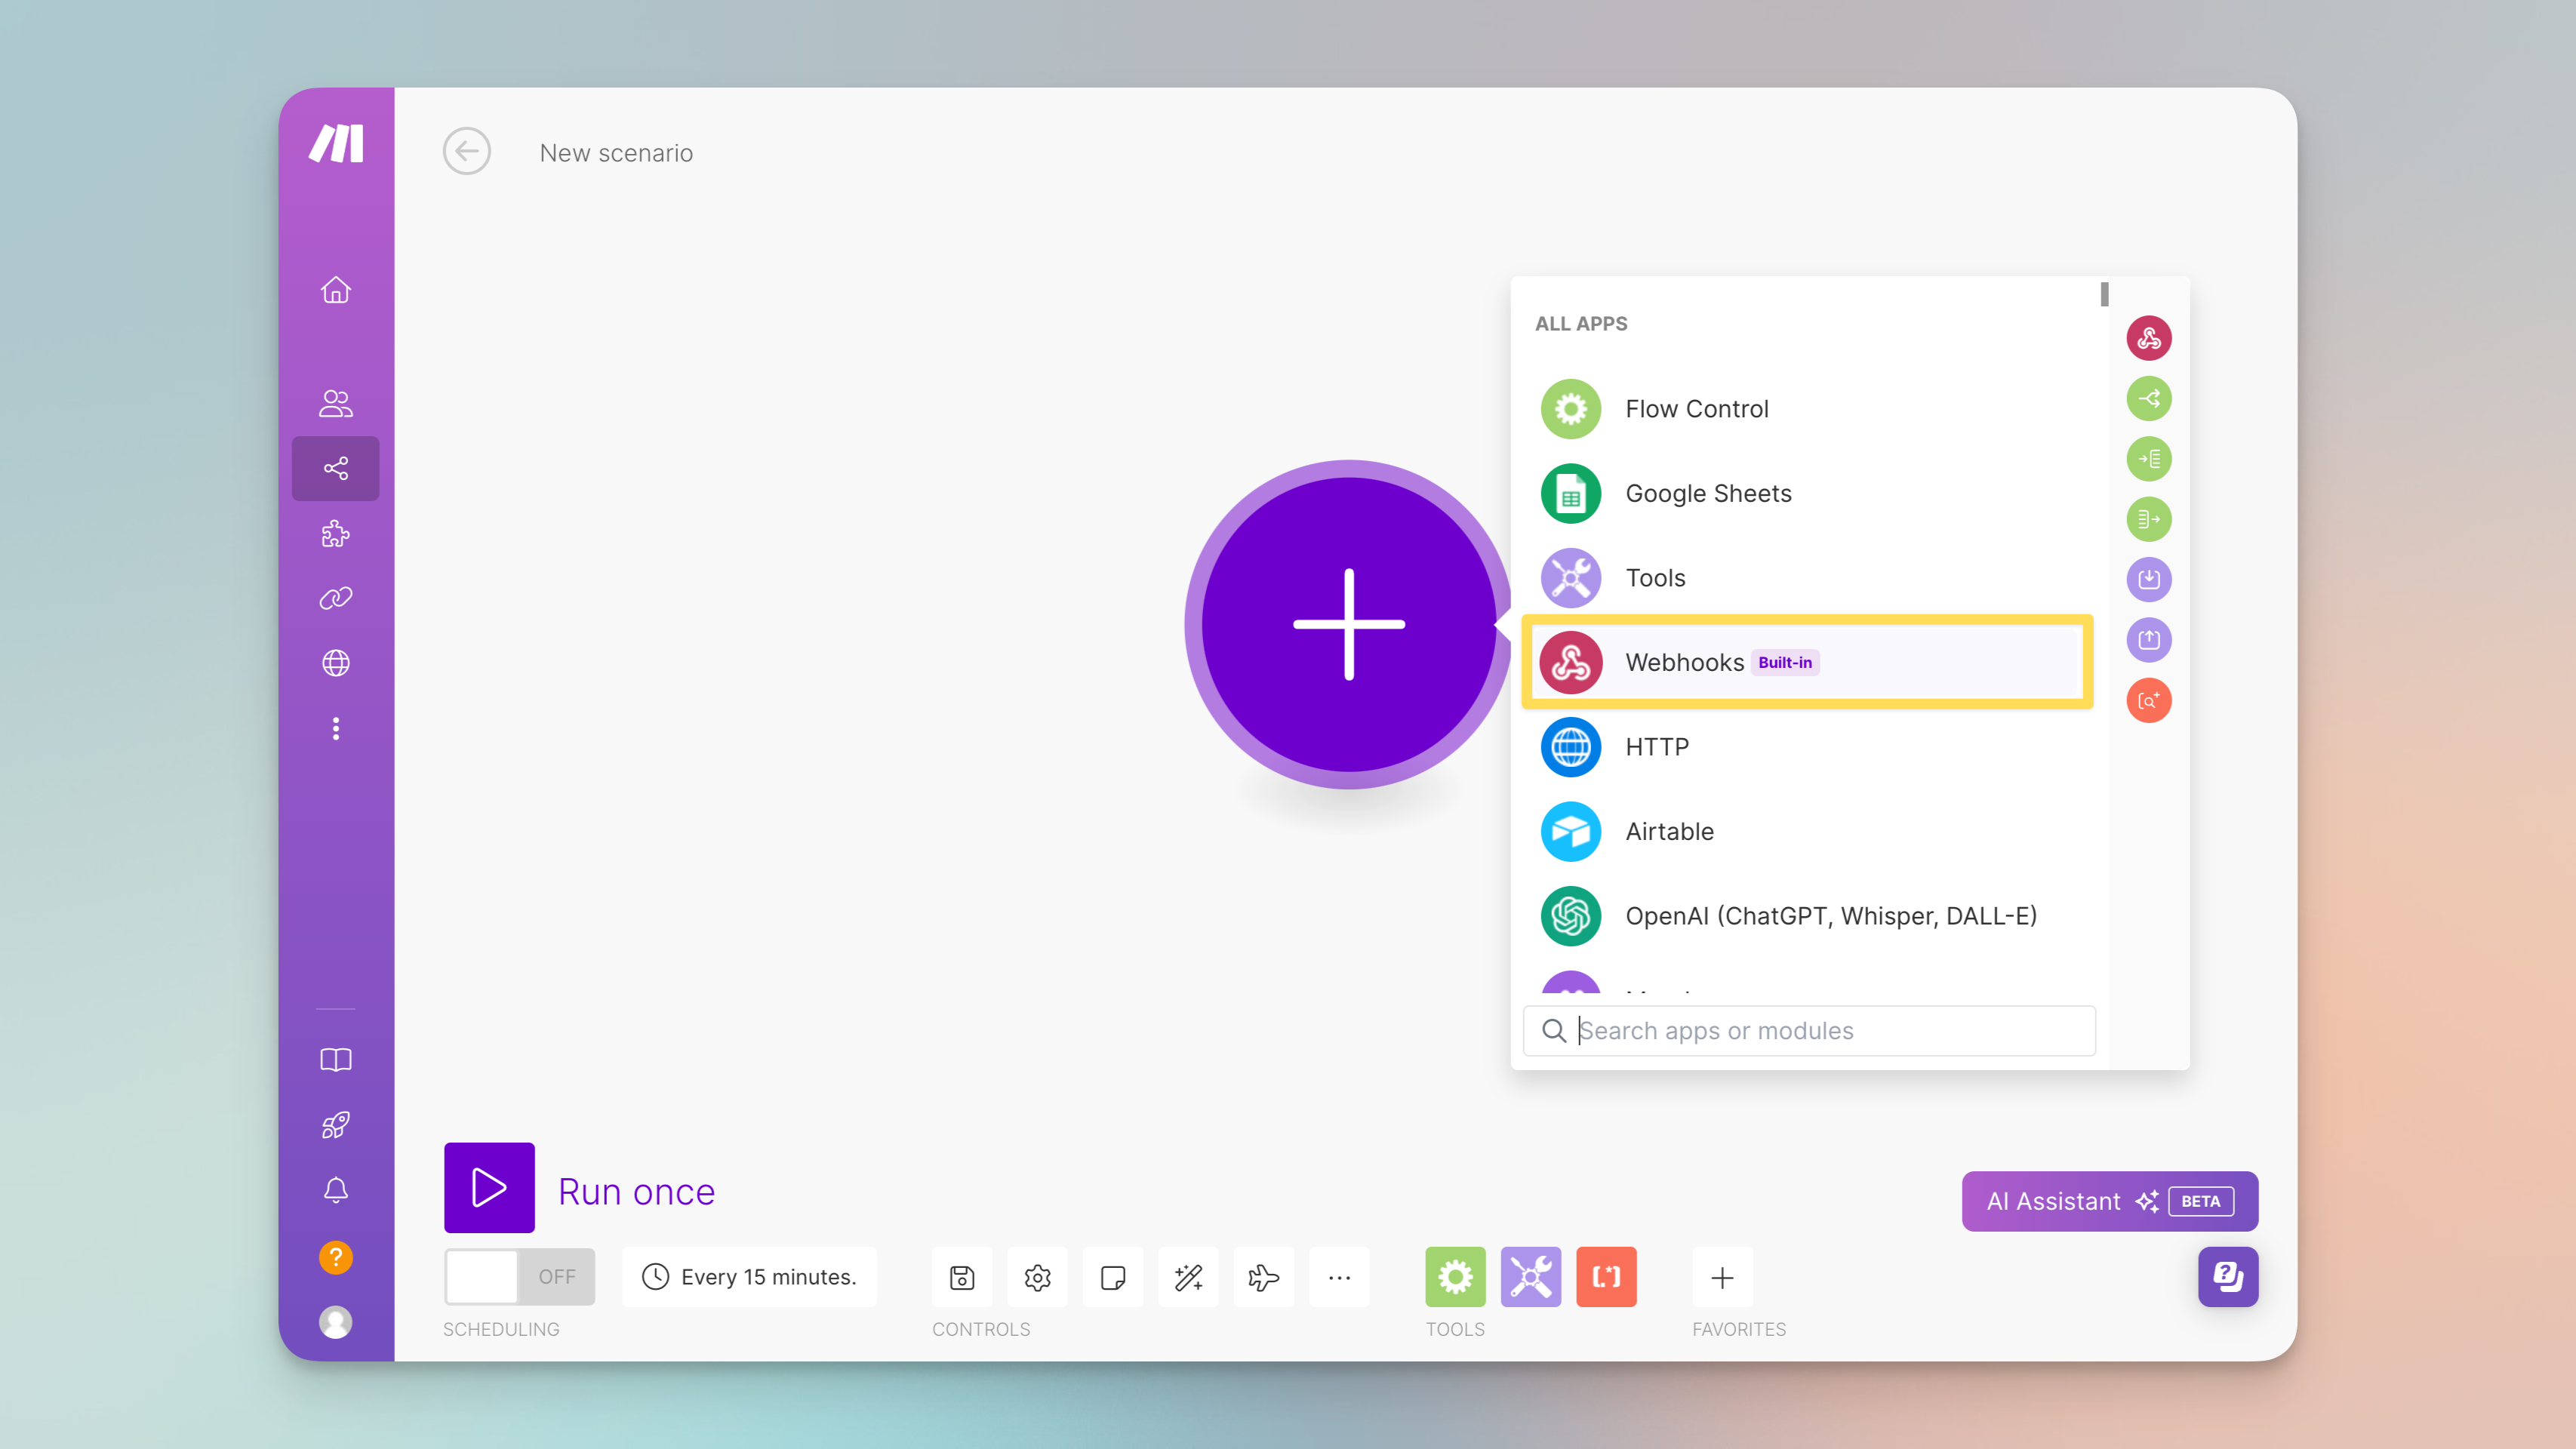
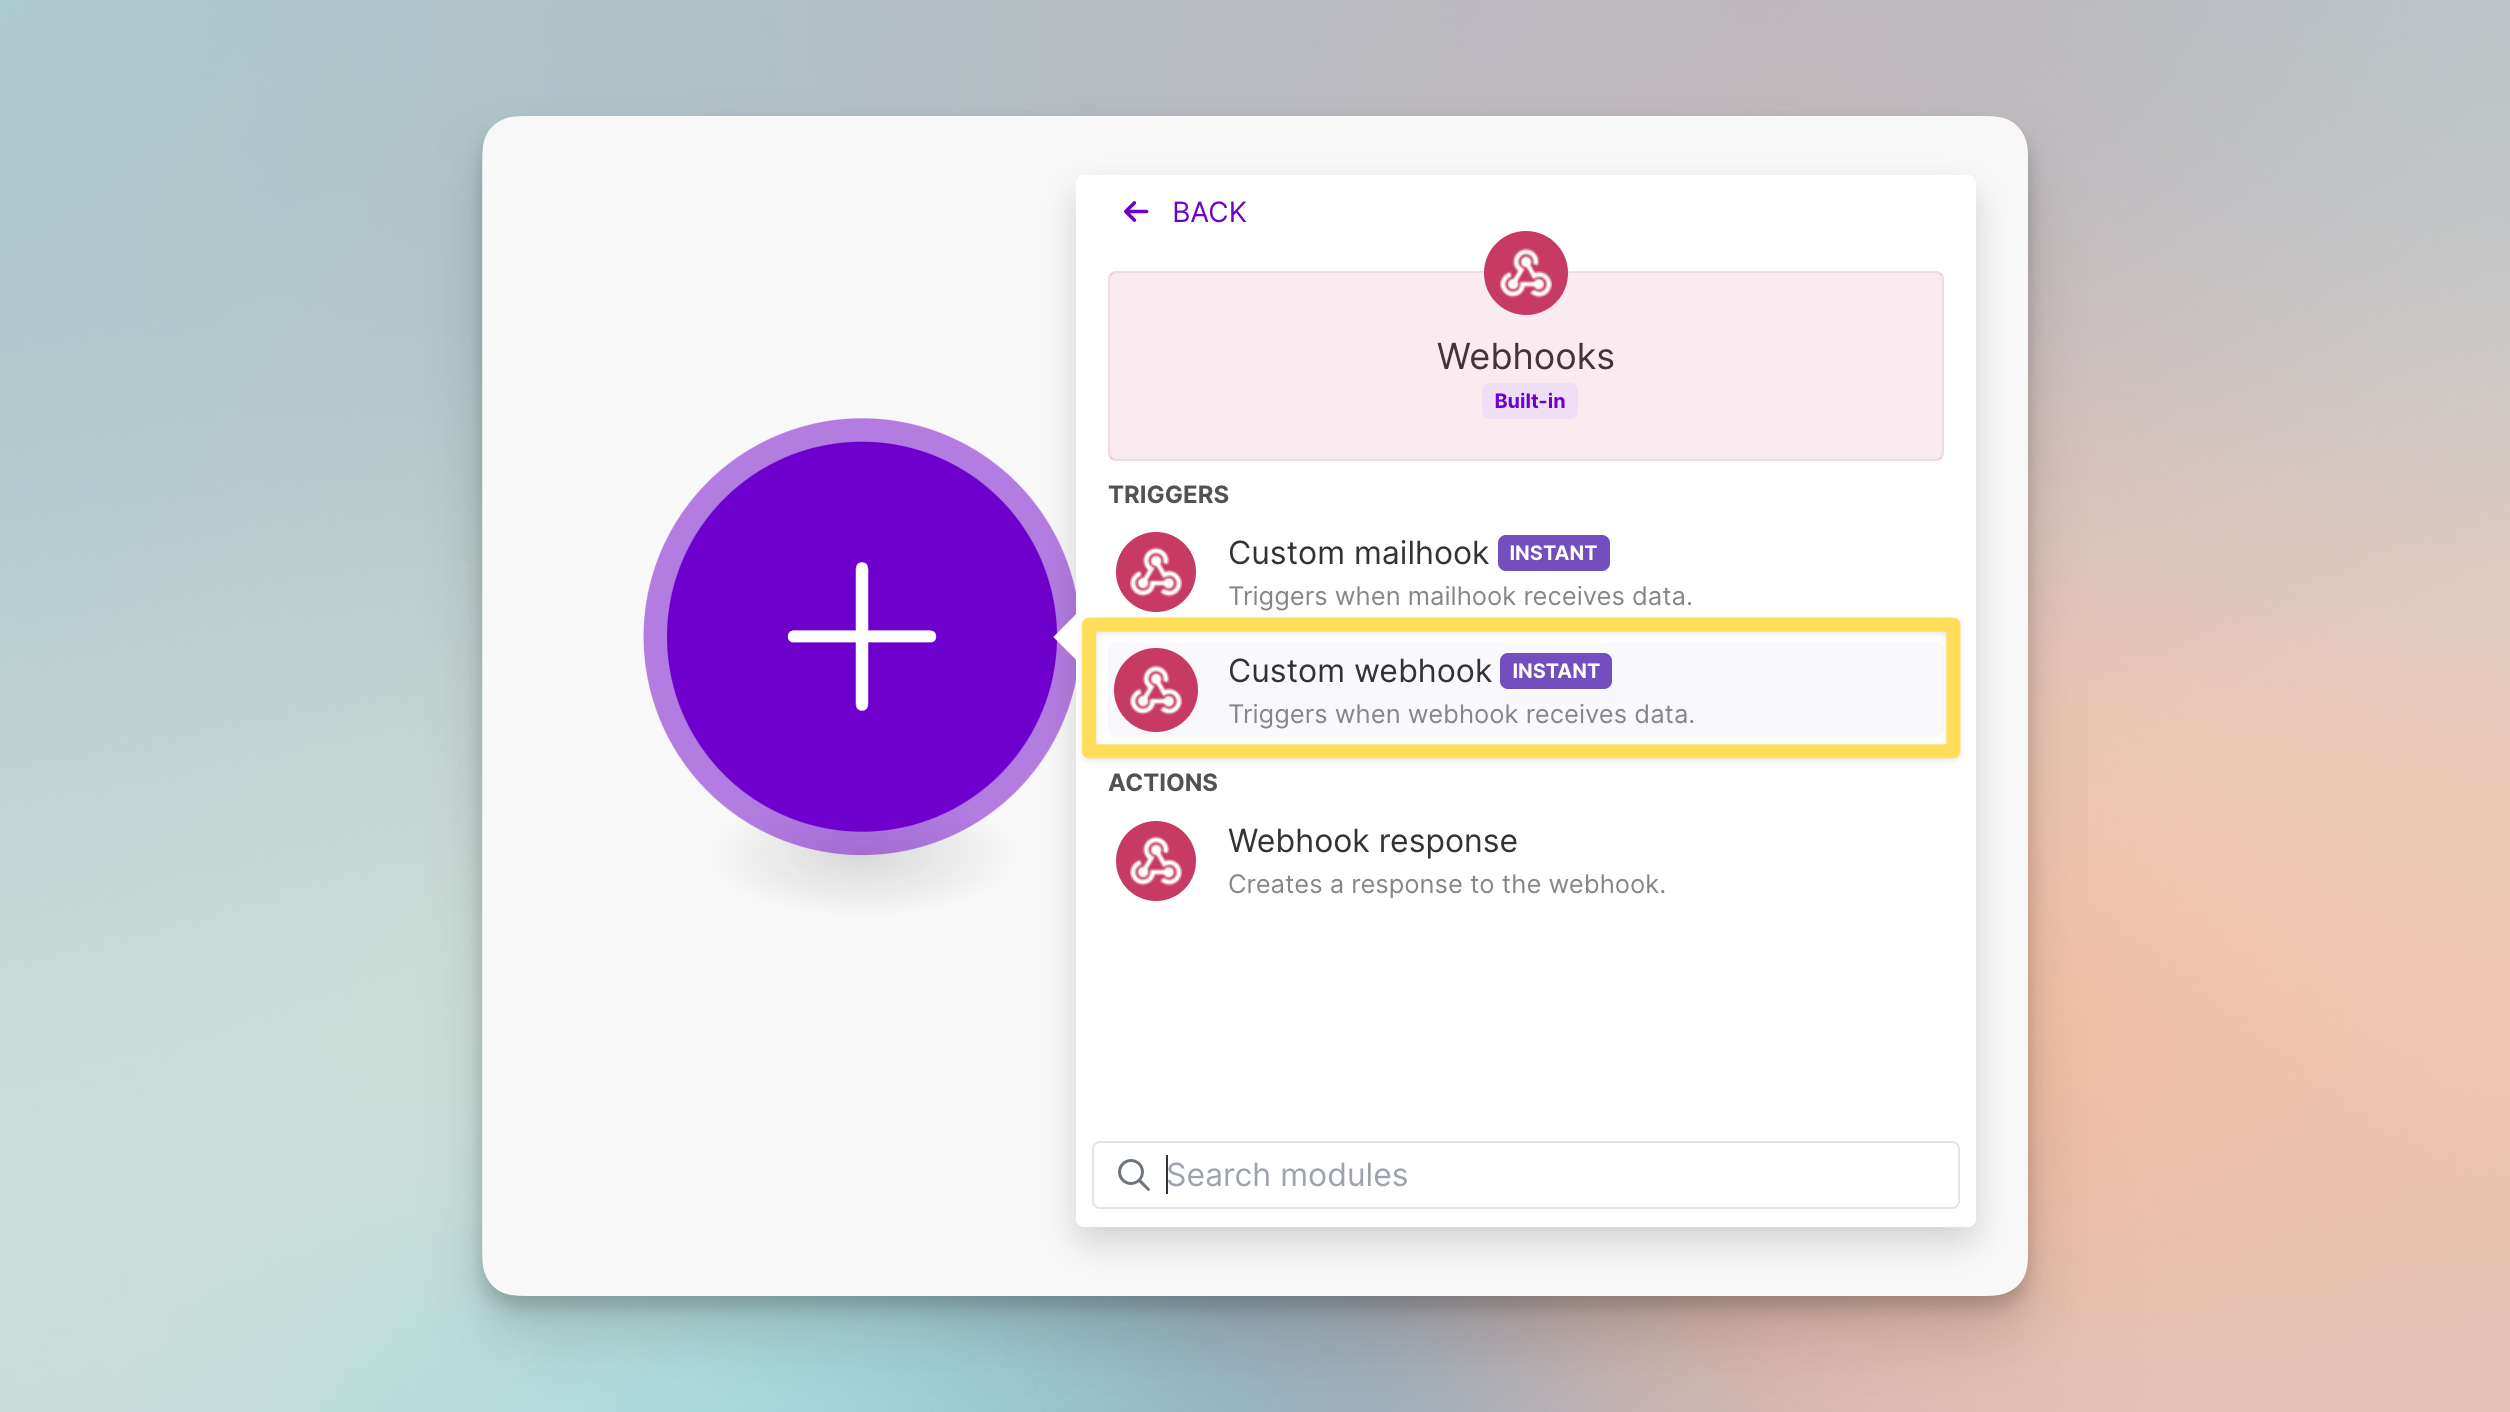
Now in your Make account, click on “Create a new scenario” from the dashboard, then click the big "+" button to add your first module. Then search for “Webhooks” and select the “Webhooks” module from the list.
Choose “Custom Webhook” — this will create a new webhook that you can configure.
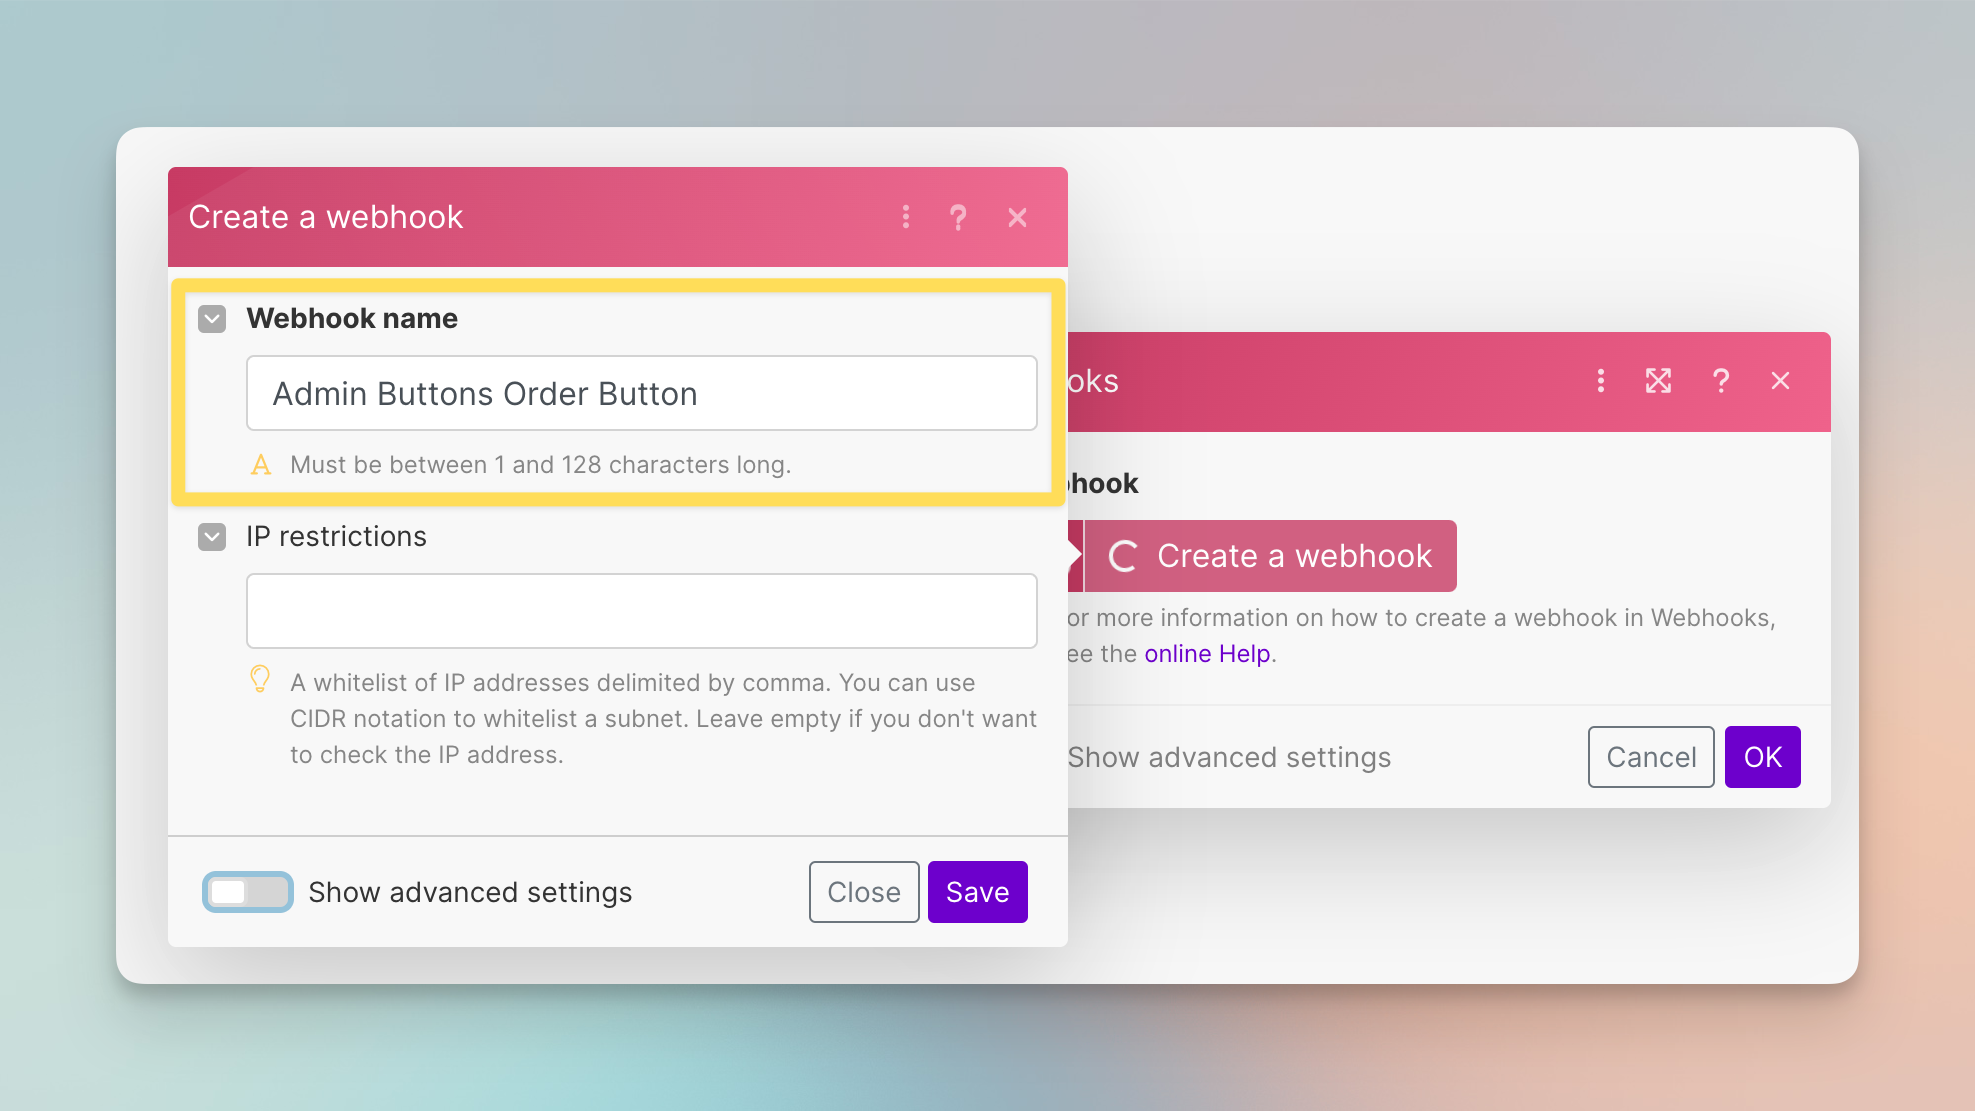
Name your webhook for clarity (e.g., Shopify to Make). You shouldn't need to worry about IP restrictions or advanced settings.
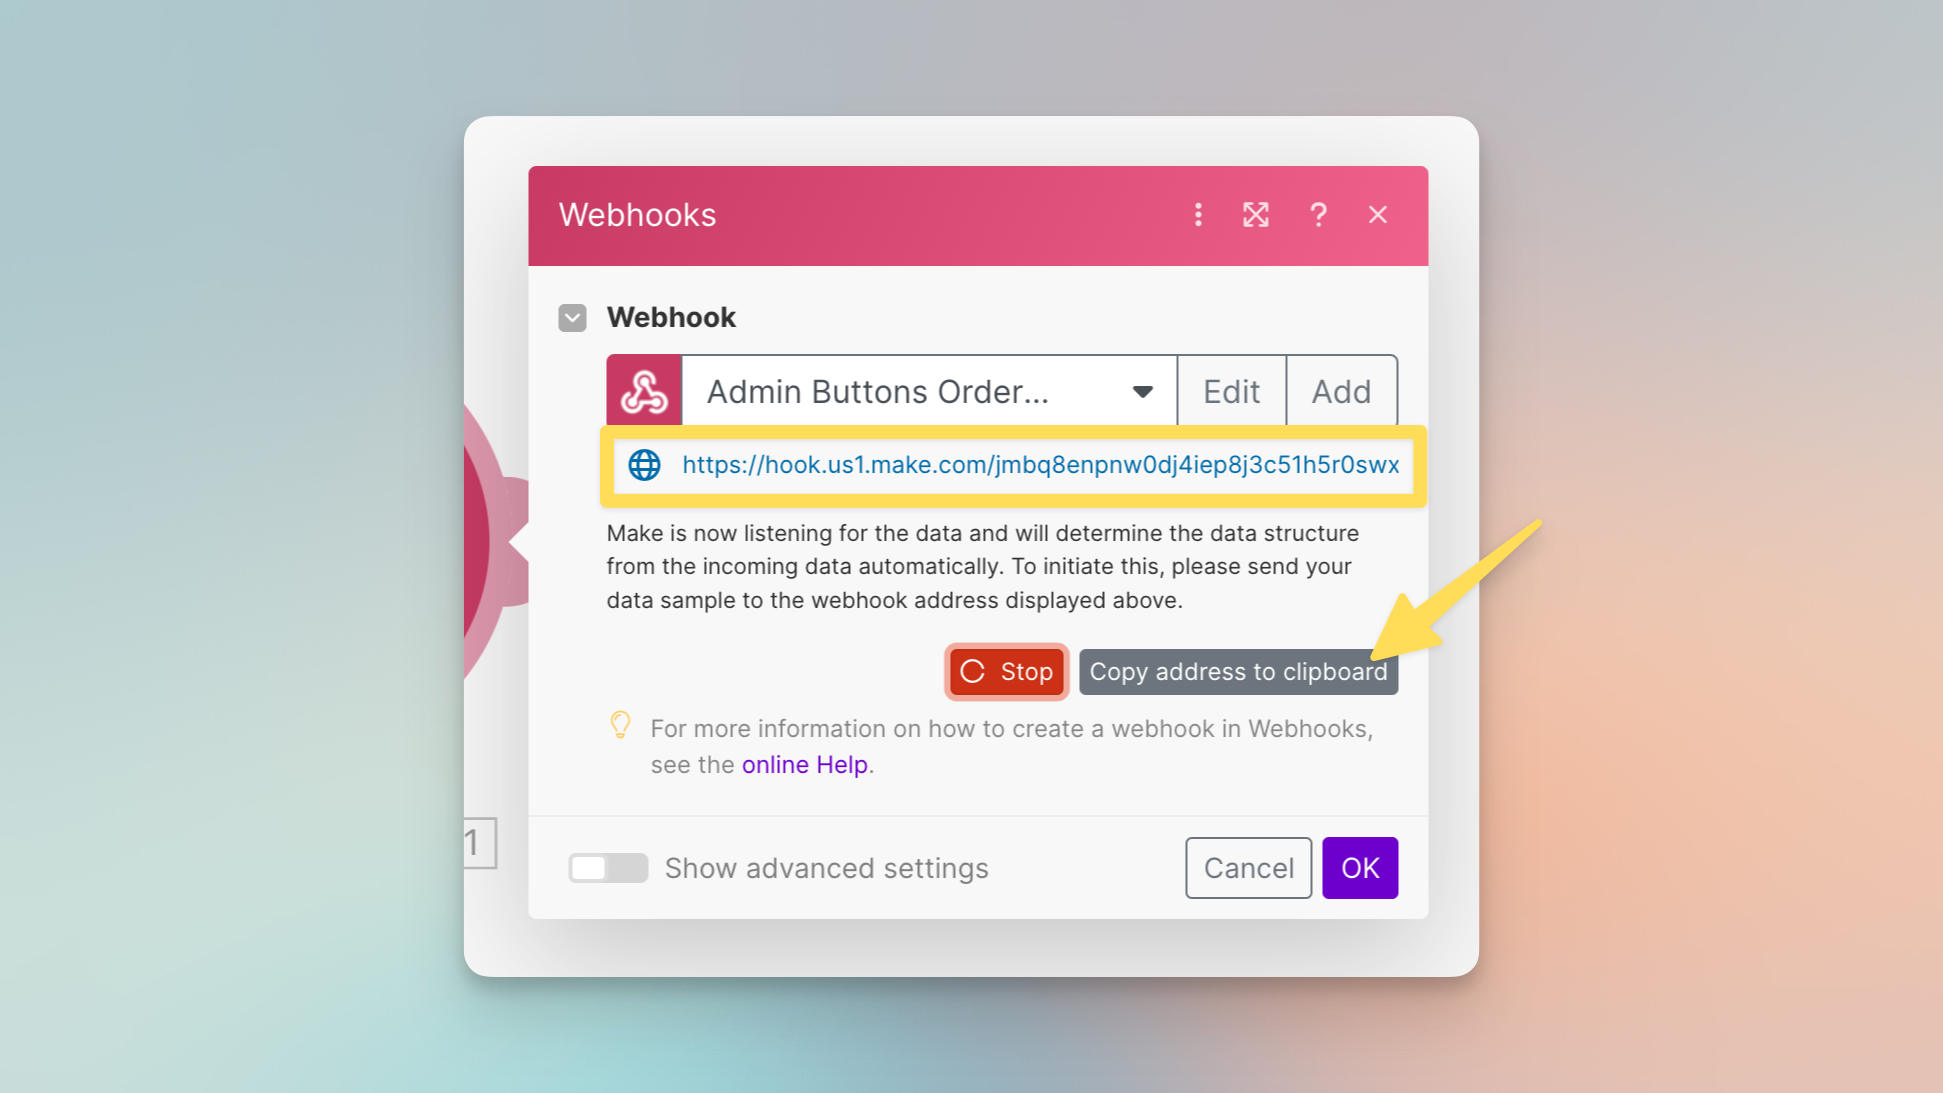
Make will generate a unique URL for your webhook. Copy this URL as it will be needed to set up the sending part from your platform like Shopify.
Step 3: Finish and test your Admin Button setup
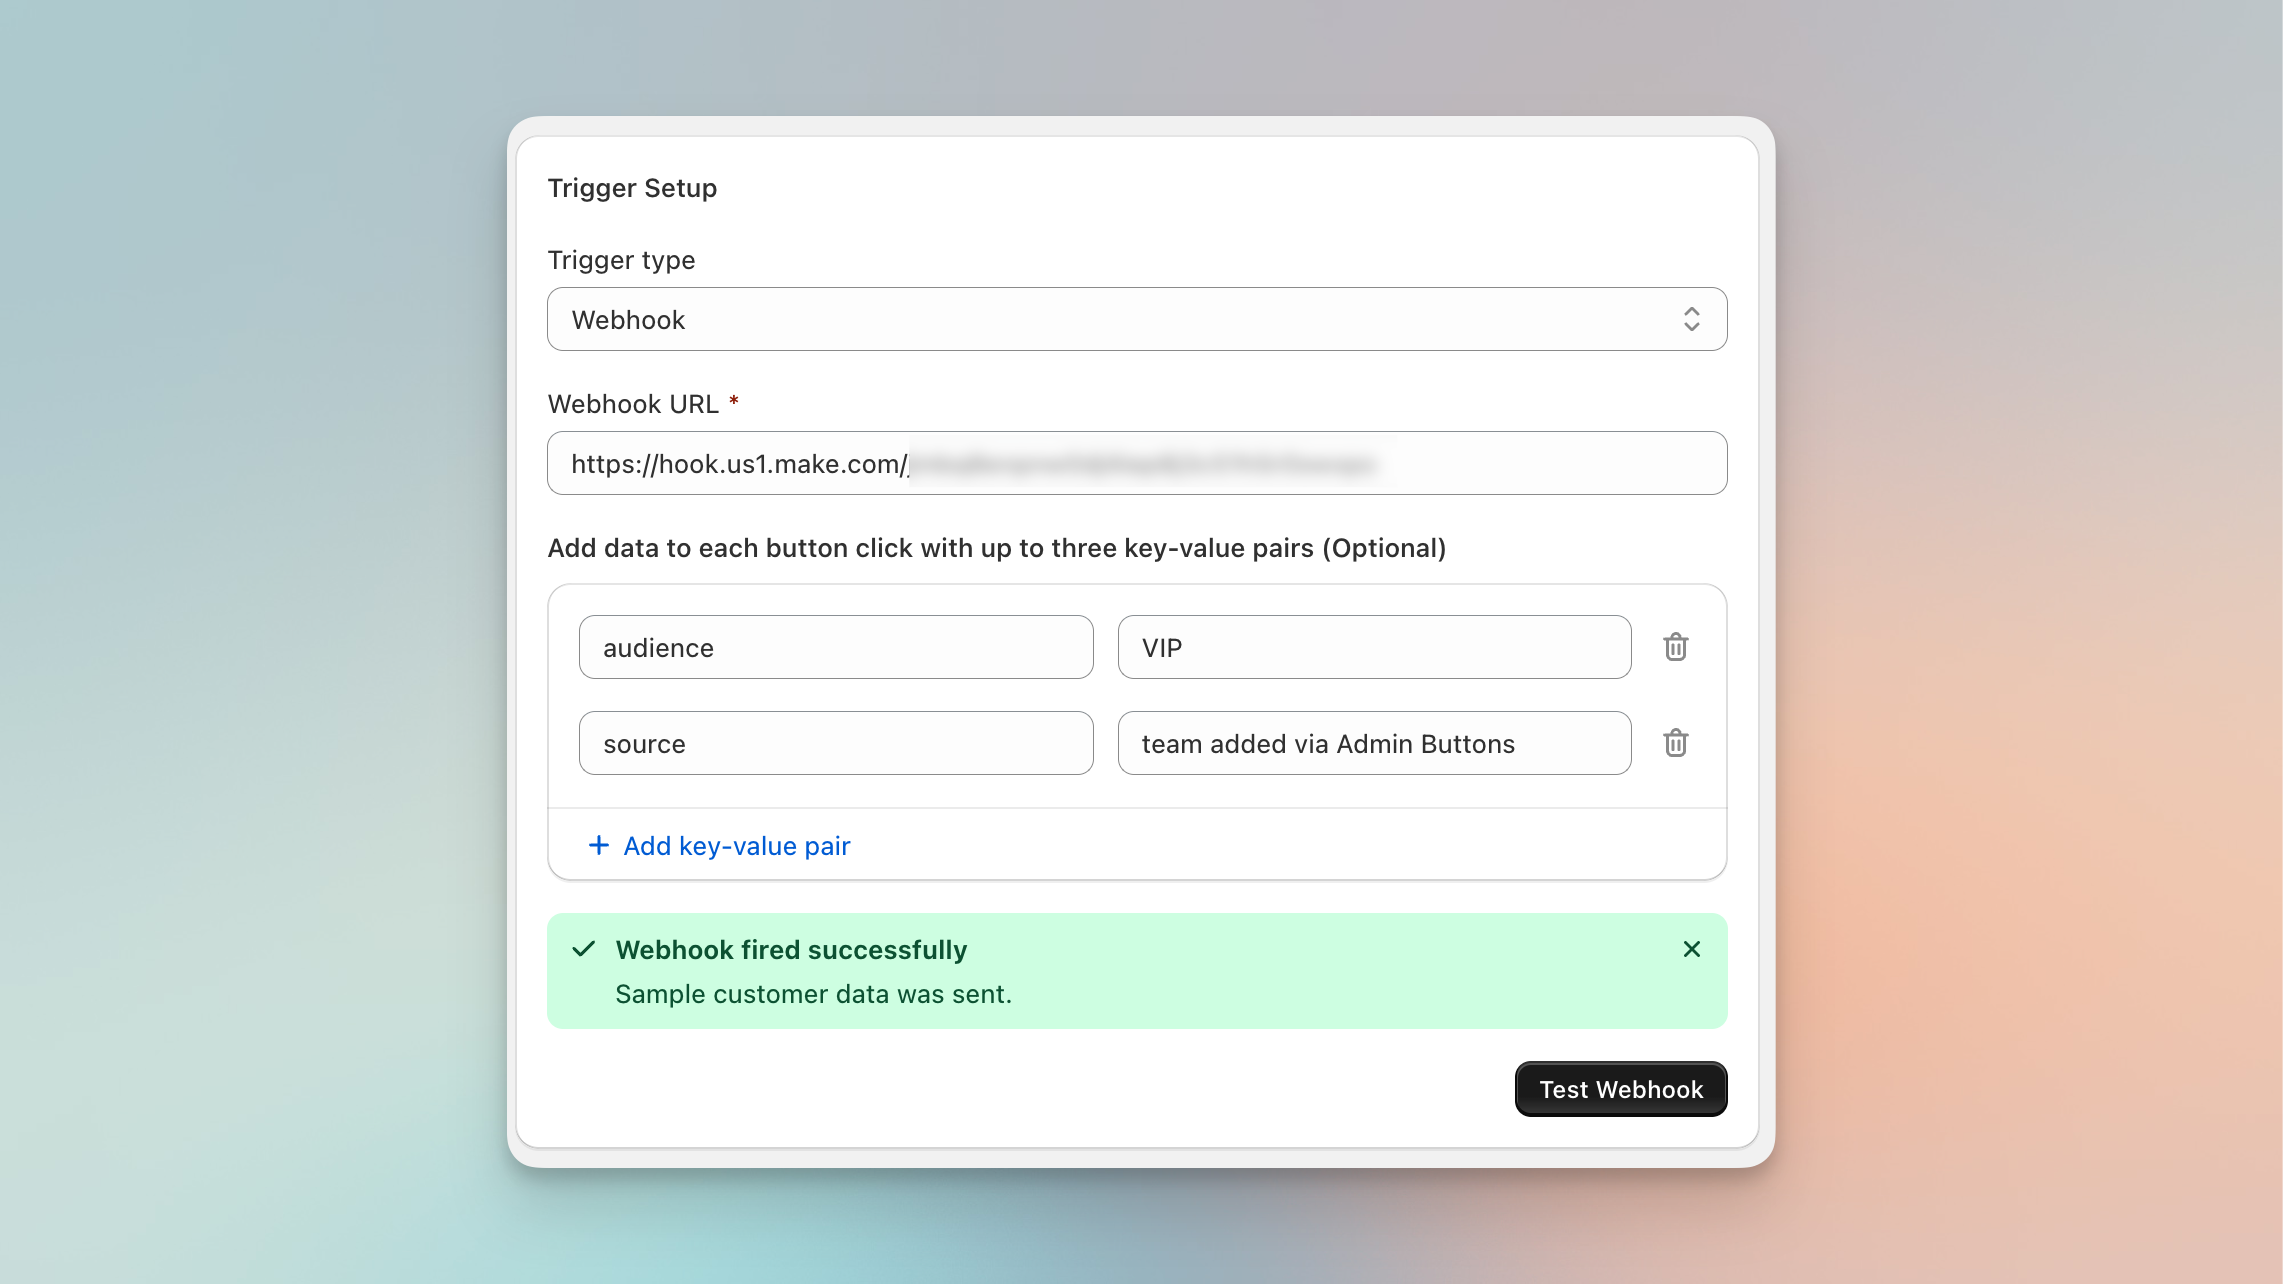
Now back in the Admin Shortcuts app, paste the webhook URL in the Trigger settings. You can also add additional "key-value pairs" to your configuration, to pass additional data every time this button is clicked.
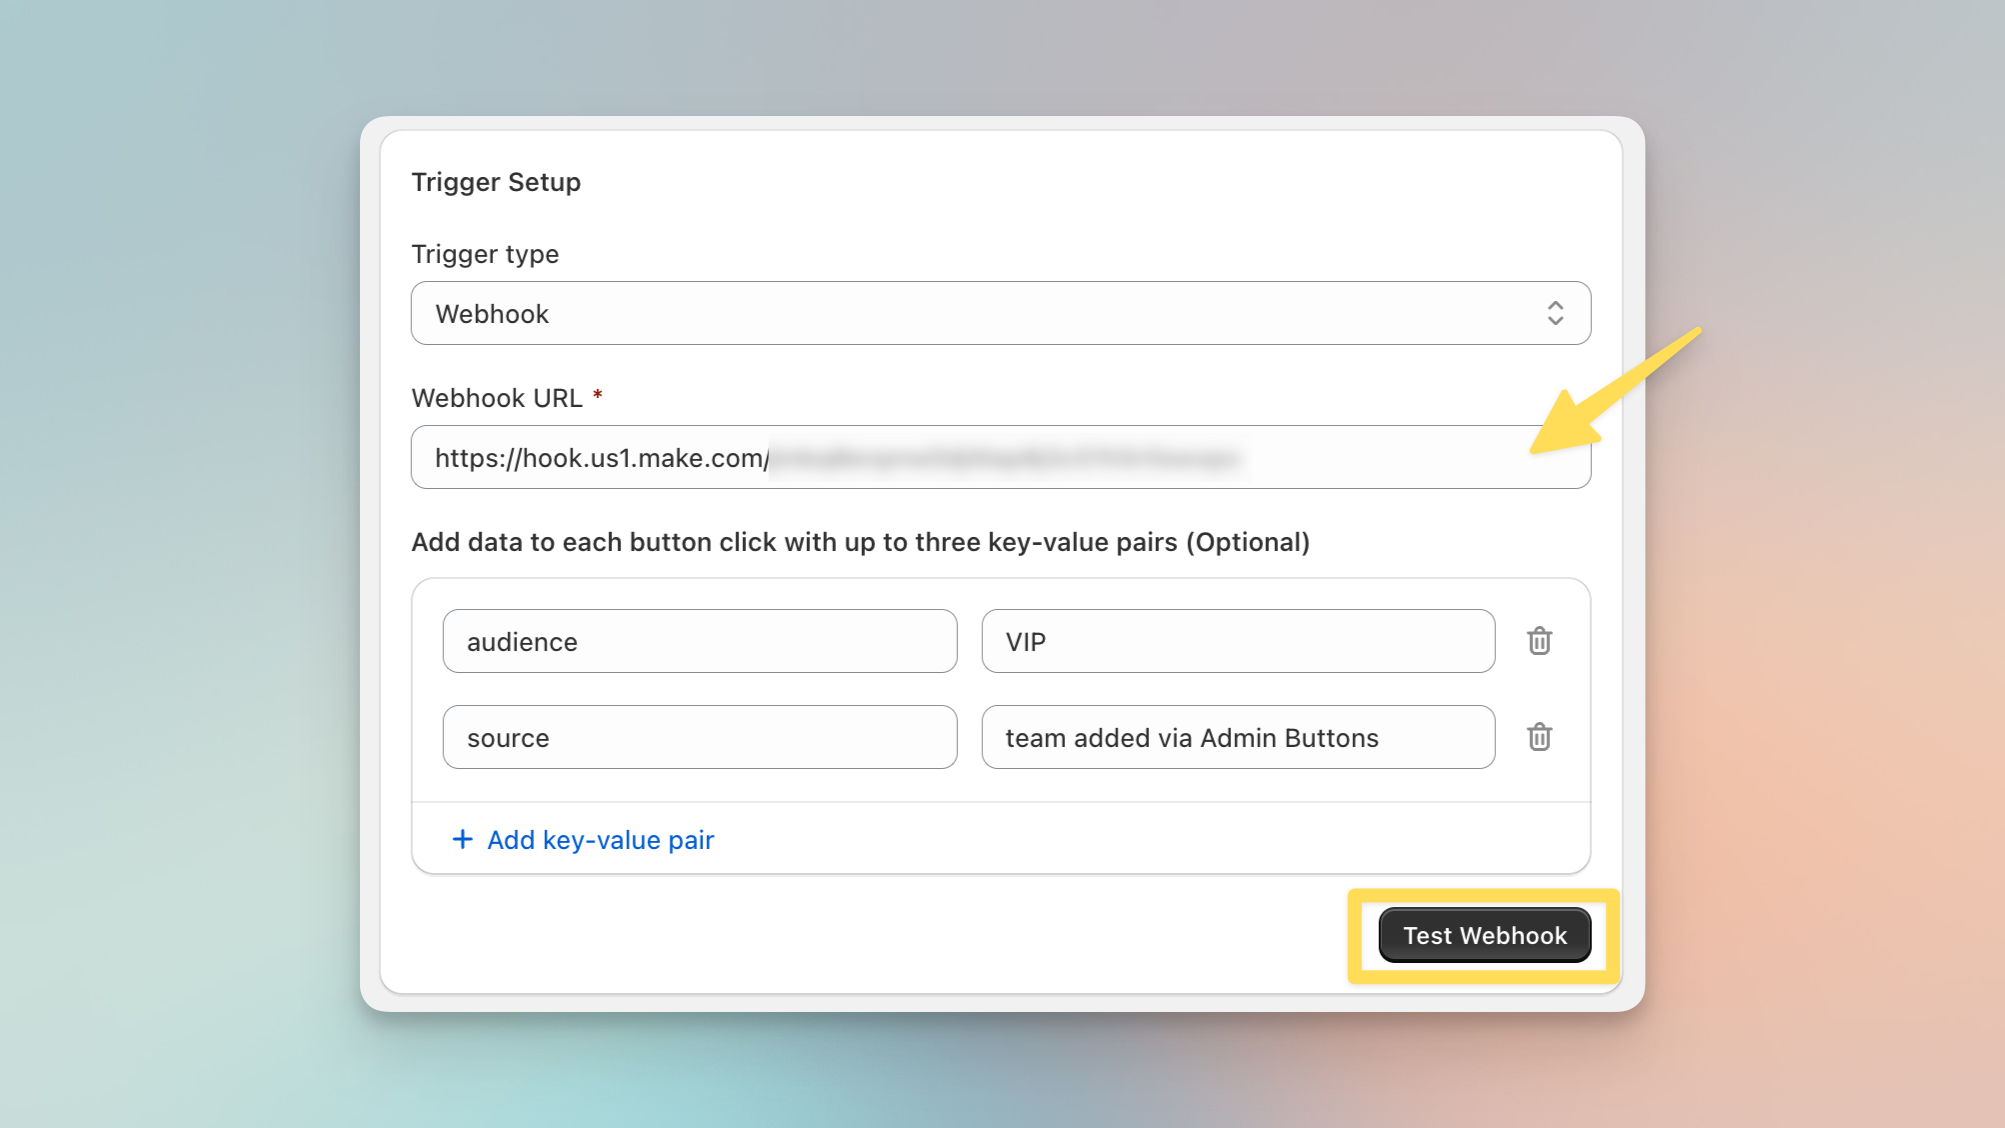
"Save" your button settings and you'll see the Test Webhook button is available. You can click it to send a sample click to send a sample JSON object, in this case a customer record, to Make.
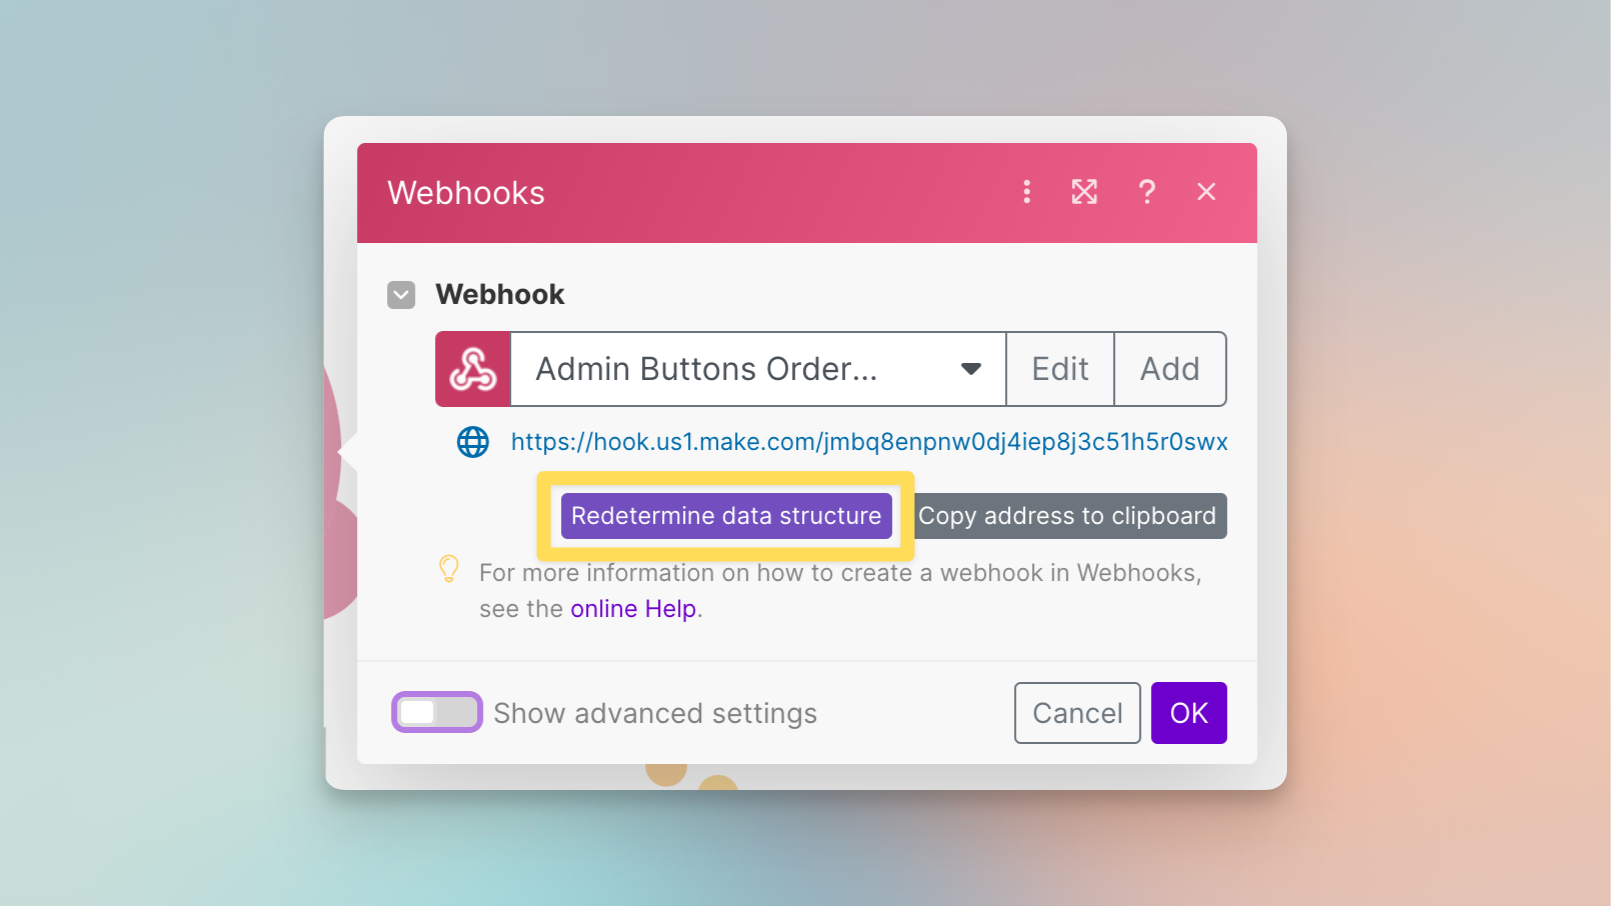
If you get an error message, Make may not be "listening" for the webhook. To wake up Make, click the "Redetermine data structure" link. Make will start listening for the webhook and will automatically parse the sample record to make it easy to use in the rest of your scenario.
Once your webhook tests are successful, you can set the button status to "Active" and save the
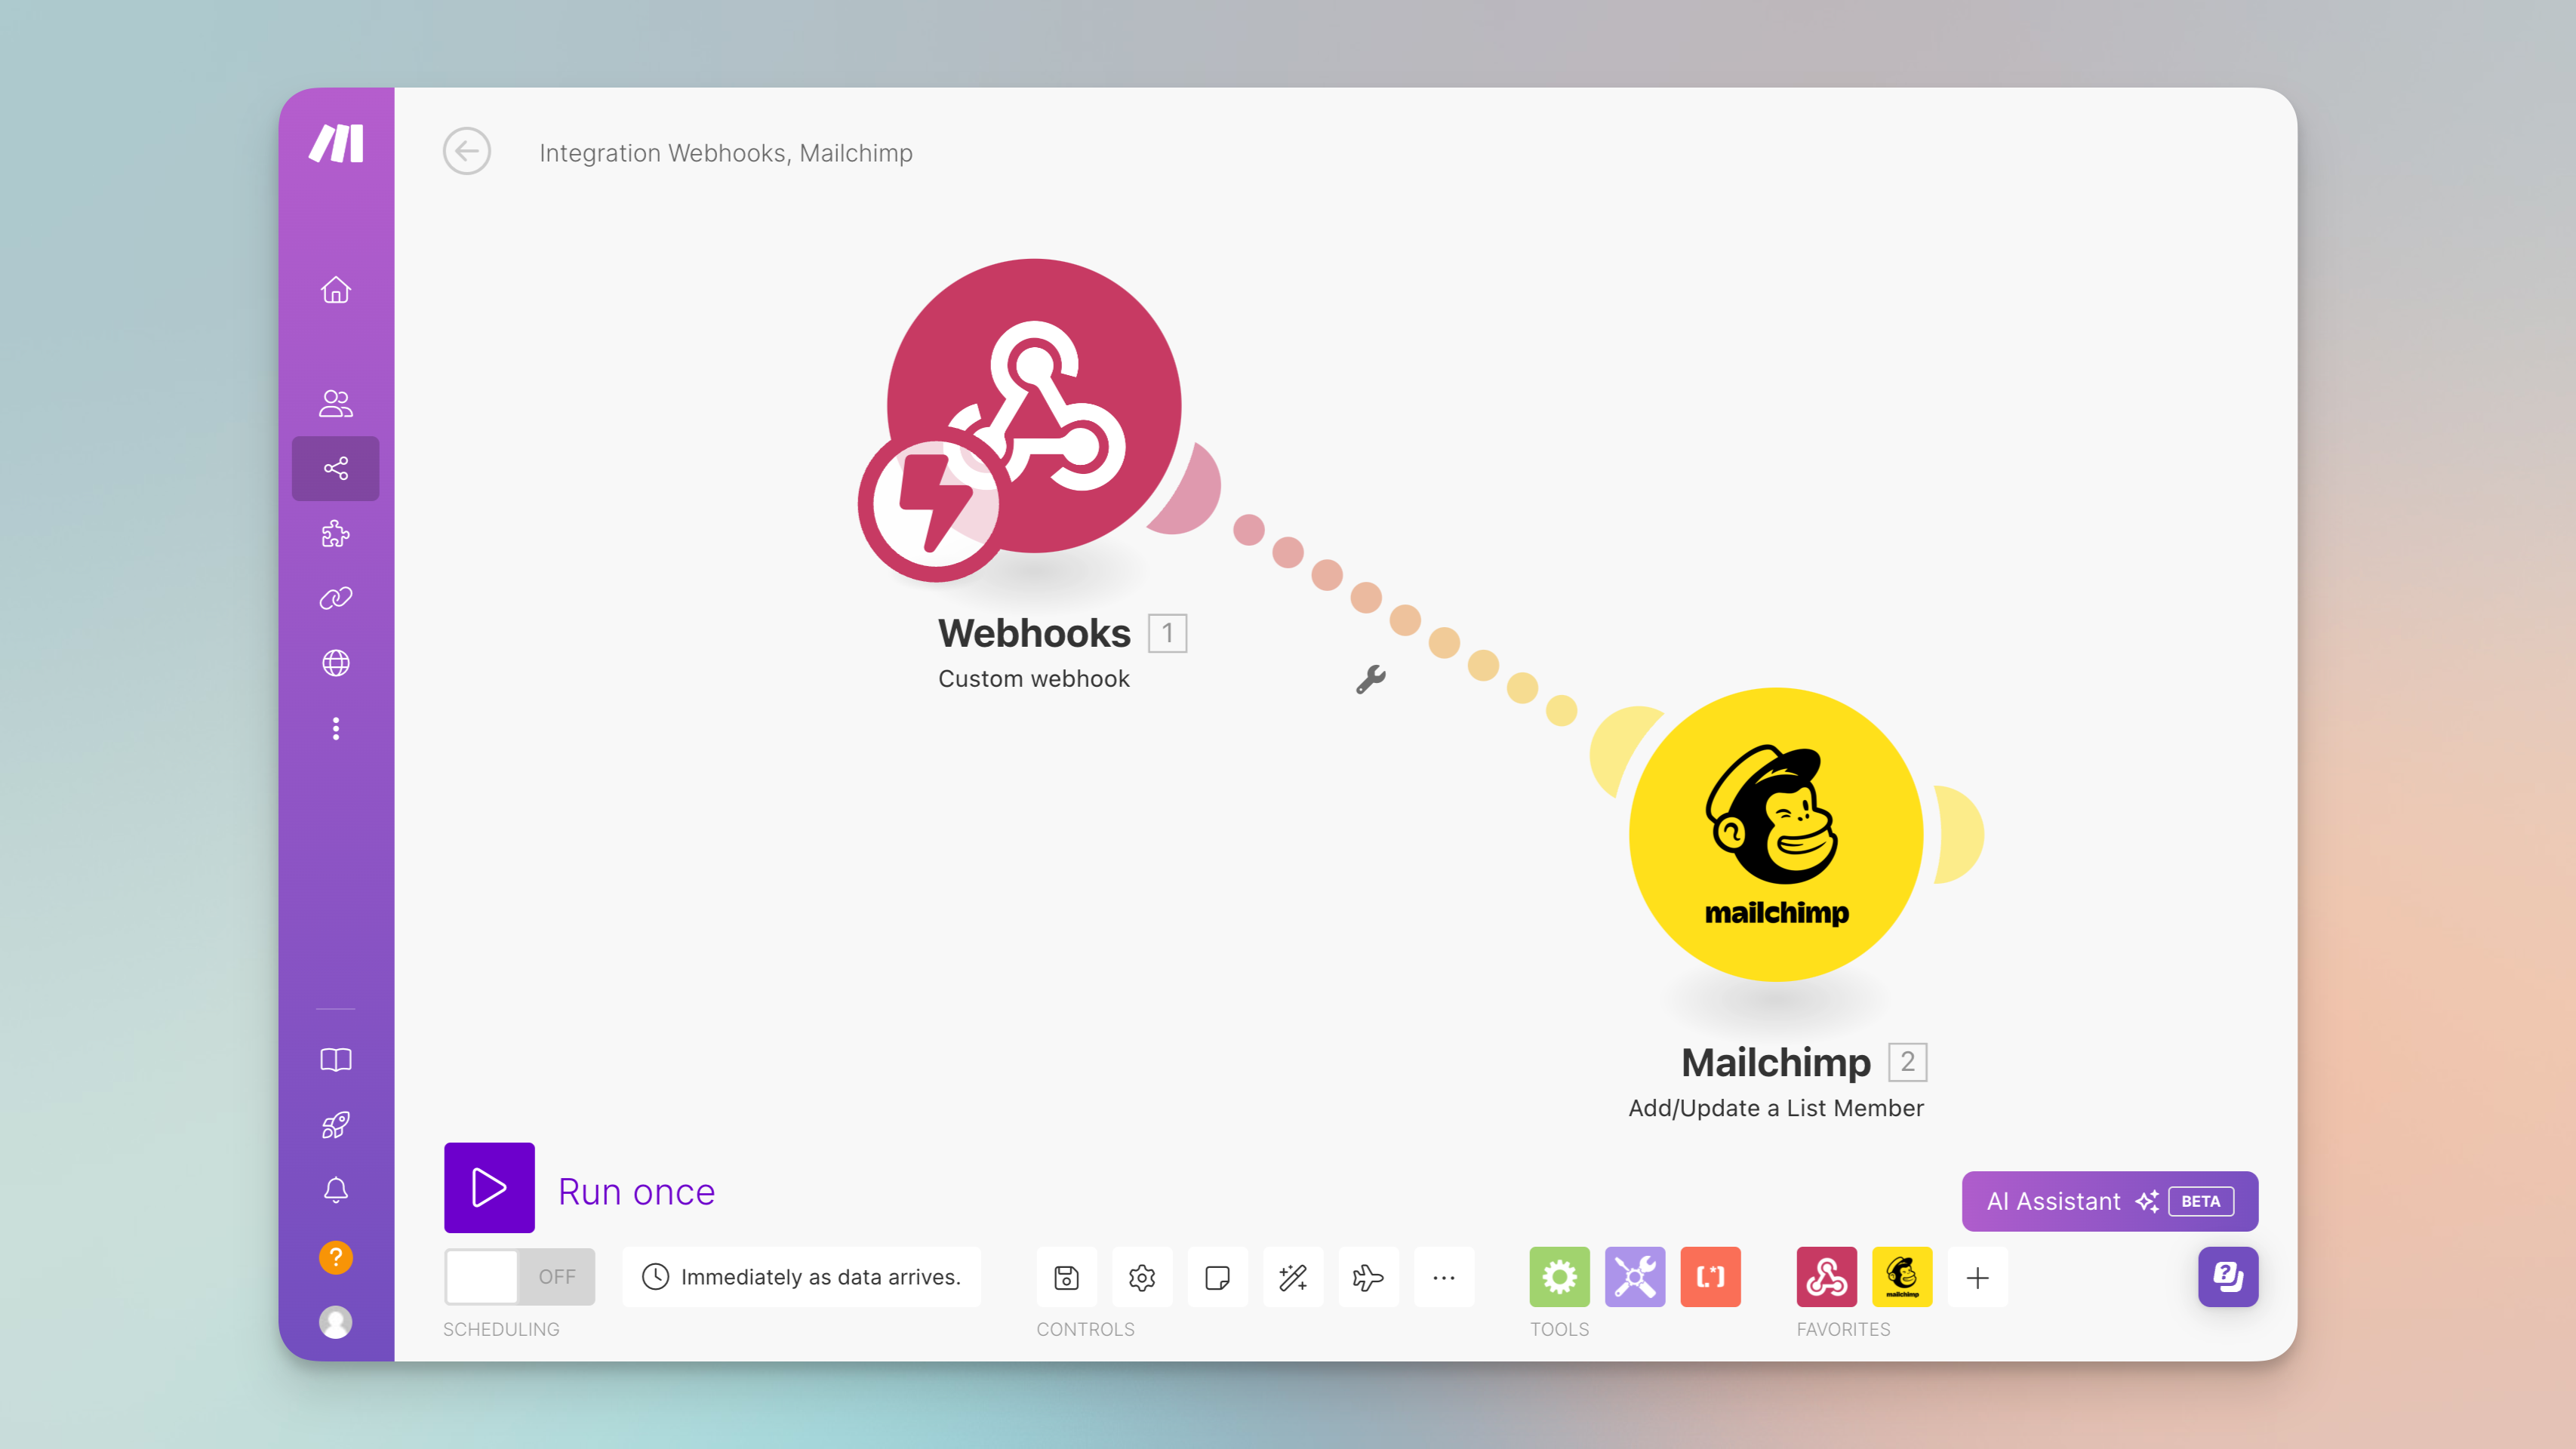
Step 4: add steps to your Make scenario
In our scenario, you would add a Mailchimp scenario and connect it to the Webhook node. Check Make's documentation for full instructions on setting up scenarios.
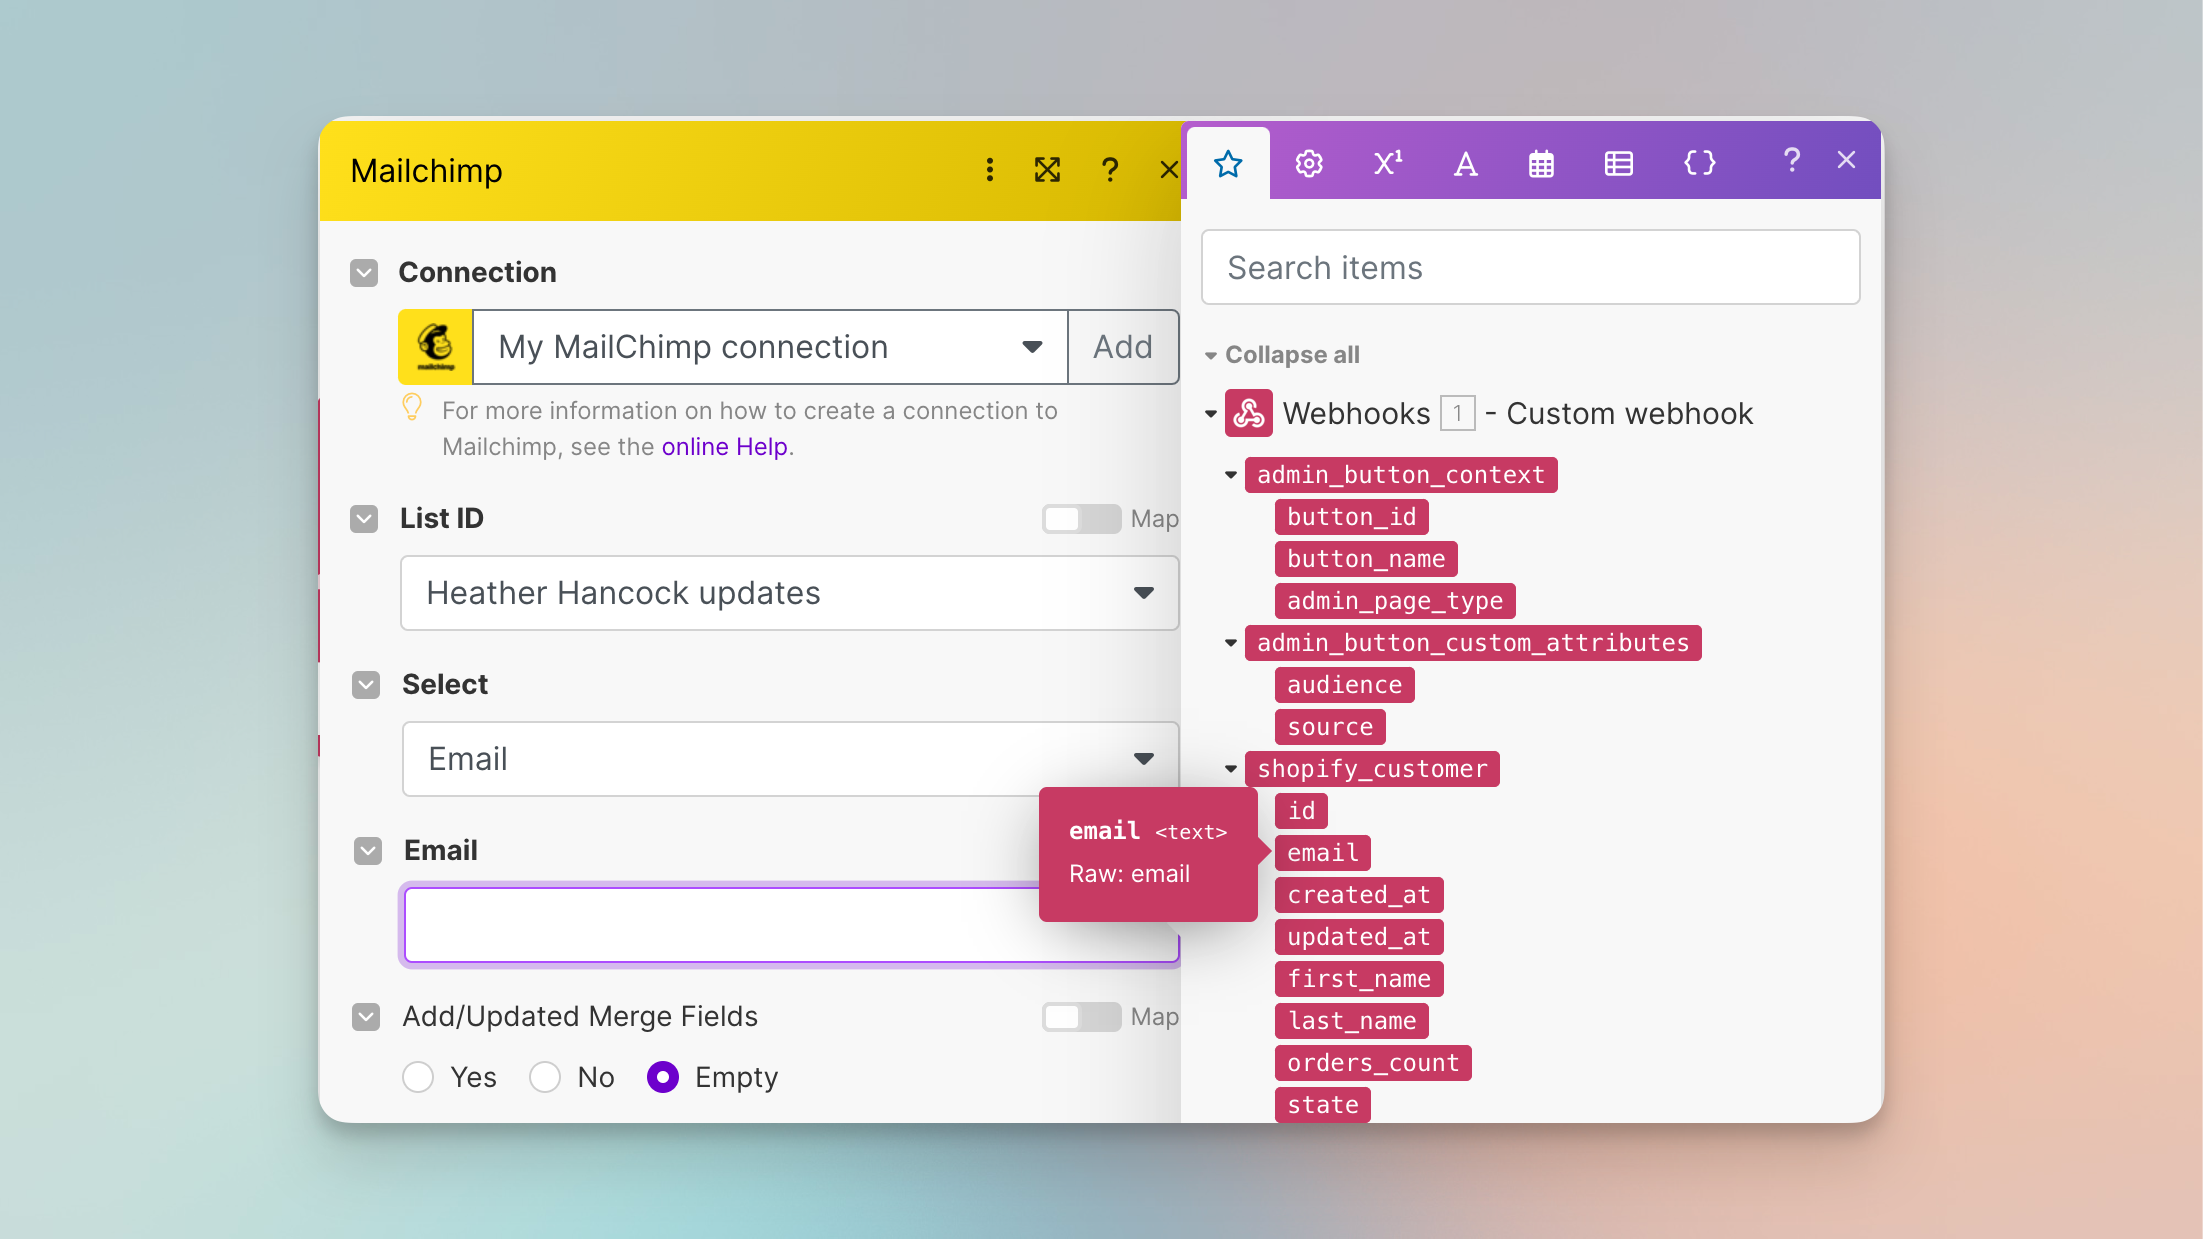
Make lets you "map" fields from the webhook you received to other apps in your scenario. Connect the output of the webhook module to input fields of action modules, configuring each to use specific pieces of the data received from the webhook.
Once your scenario is configured and tested, click “Save”. Set the scheduling options for how often you want the scenario to check for new data. And activate it by switching it on.
Step 5: Activate Admin Shortcuts on your Shopify Admin page
To see your Admin Button on your order pages in Shopify admin, there's two last step to complete:
-
Set your button to "Active" on the button page and save the button.
-
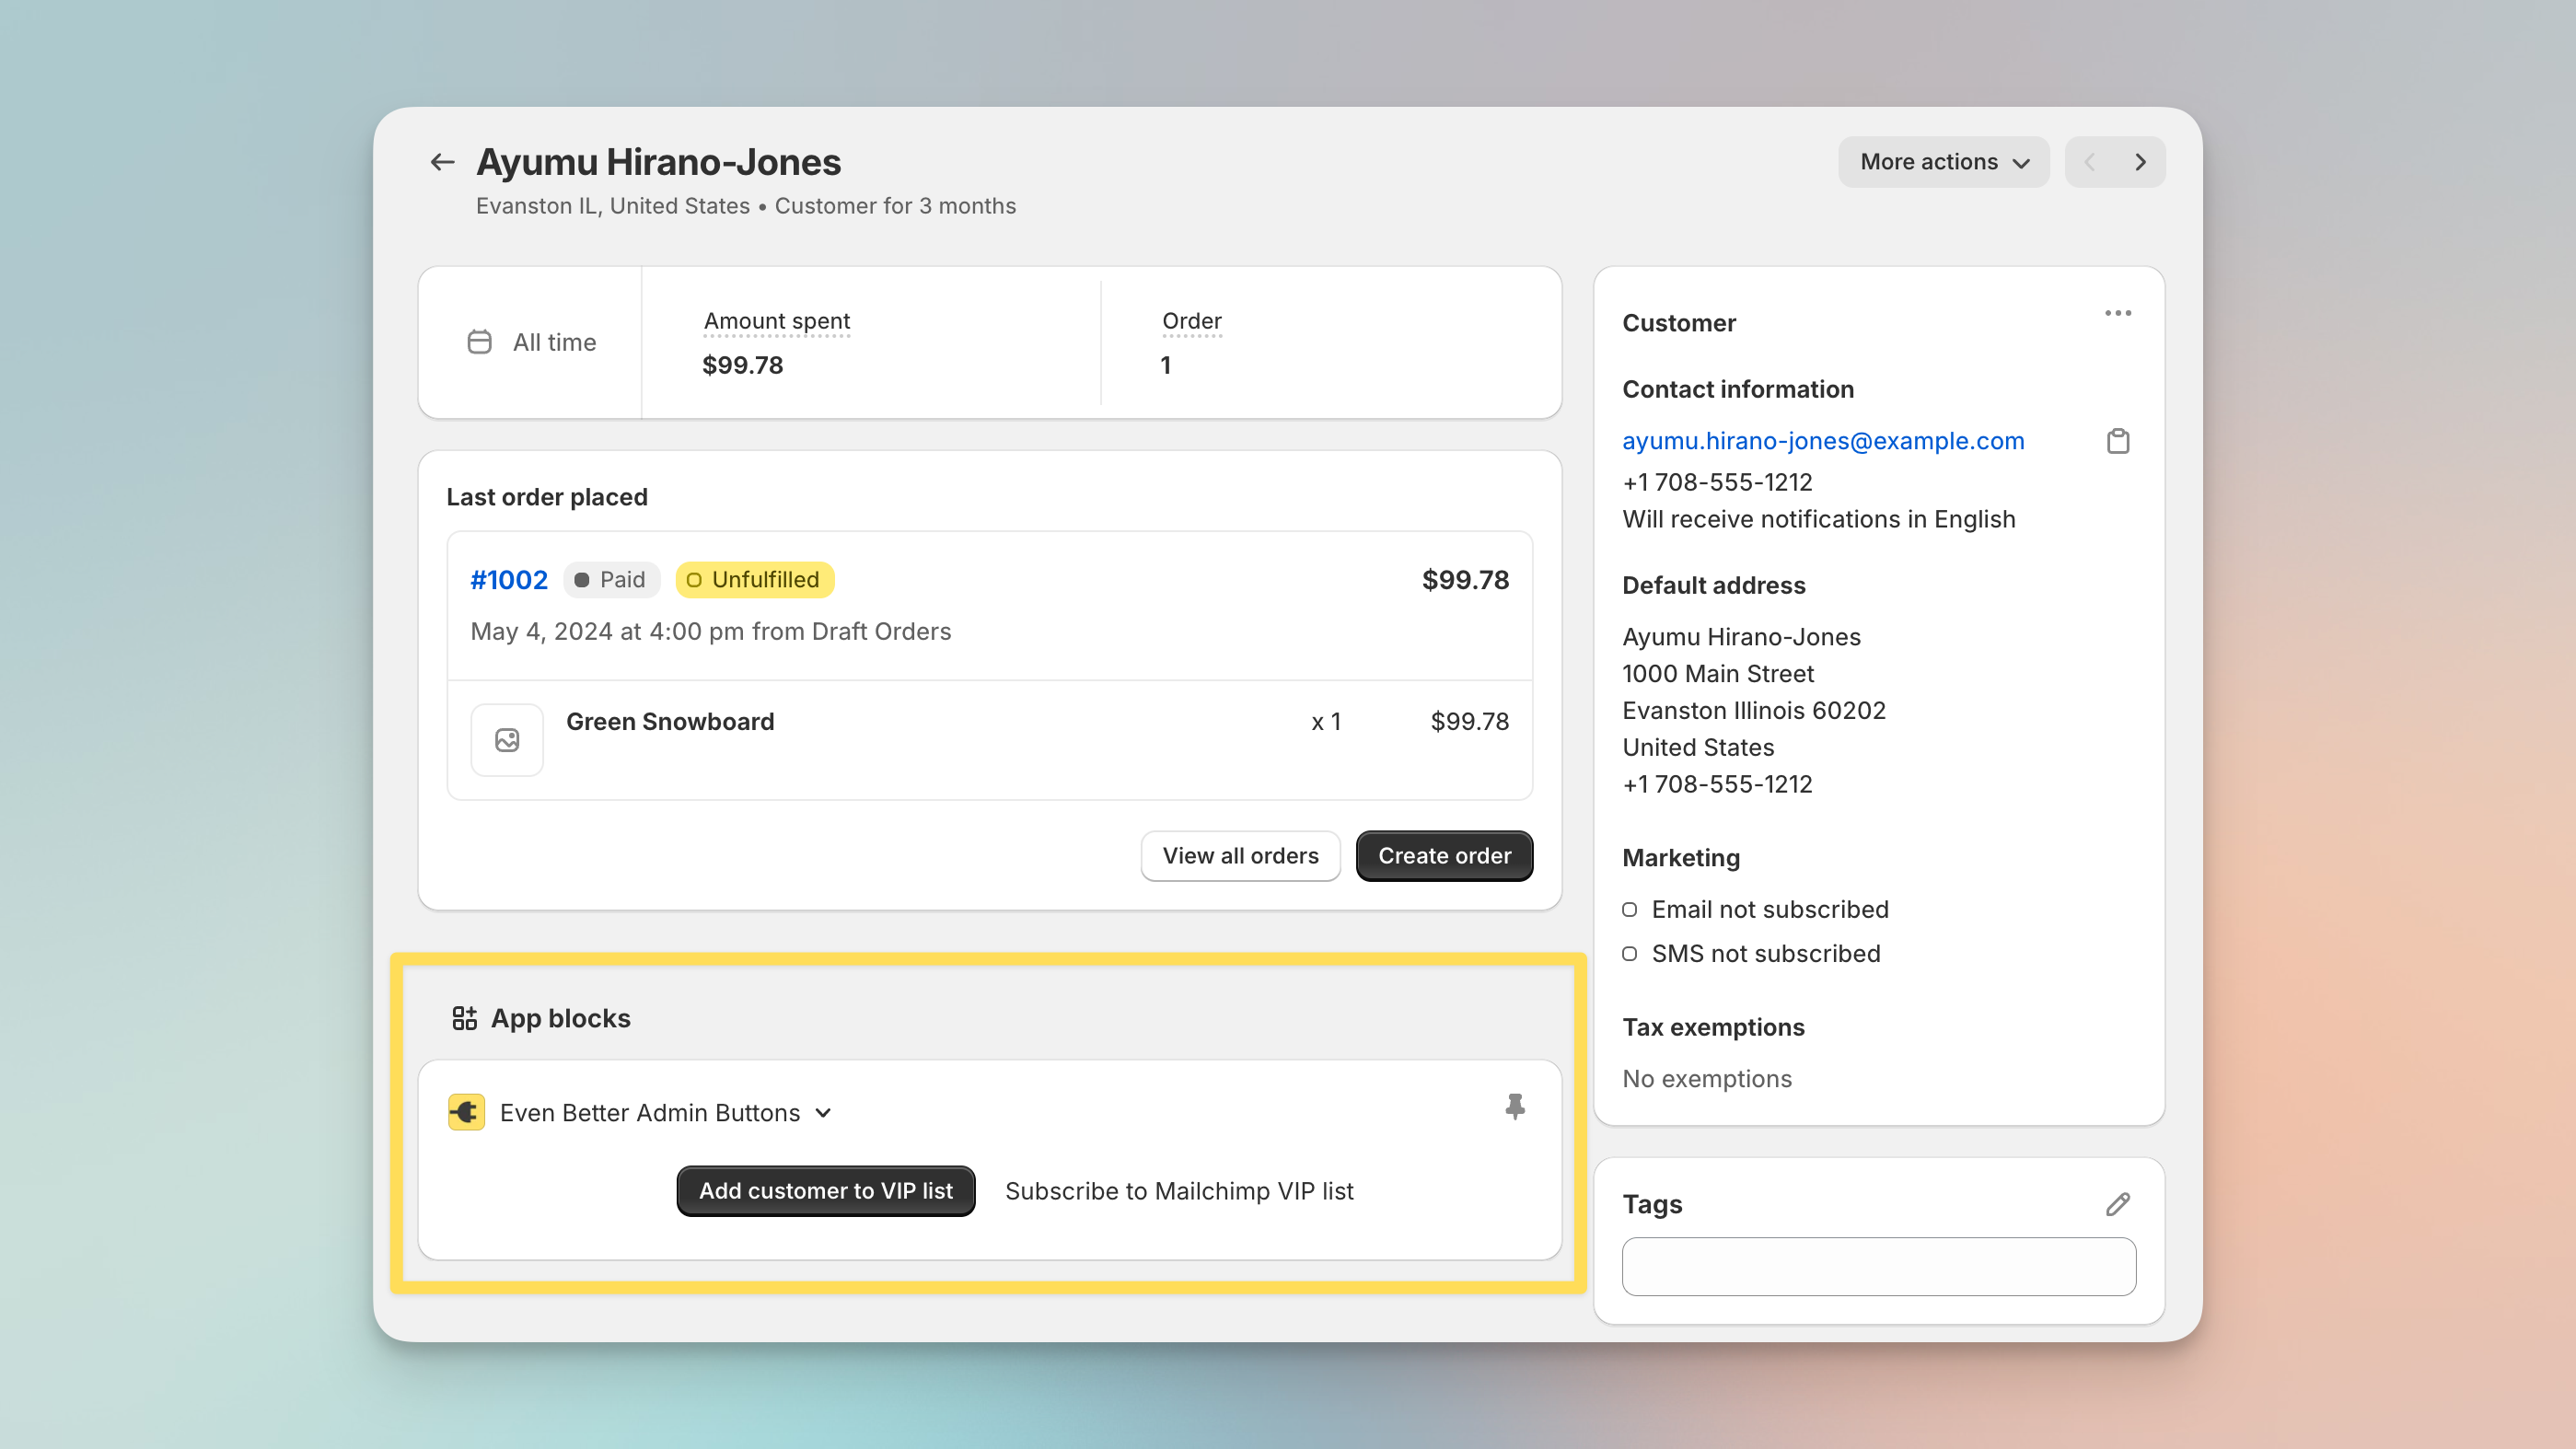
If you haven't already done so, add the app block to your admin page. Navigate to any Shopify admin page of the type you just set up in the button. Scroll all the way down to the "App block" section of the page and select the "Admin Shortcuts" option from the menu.
-
Click the Pin icon to keep the button on the page for all users of your store.
And there's your new admin button in Shopify!
Continue exploring ways to get more done from Shopify!
Congratulations! You have successfully connected Shopify admin to Make with Admin Shortcuts. There are literally countless Shopify merchant tasks you can automate from here, with these buttons and the other apps you use to manage your business, streamlining workflows and enhancing productivity. What will you automate next?